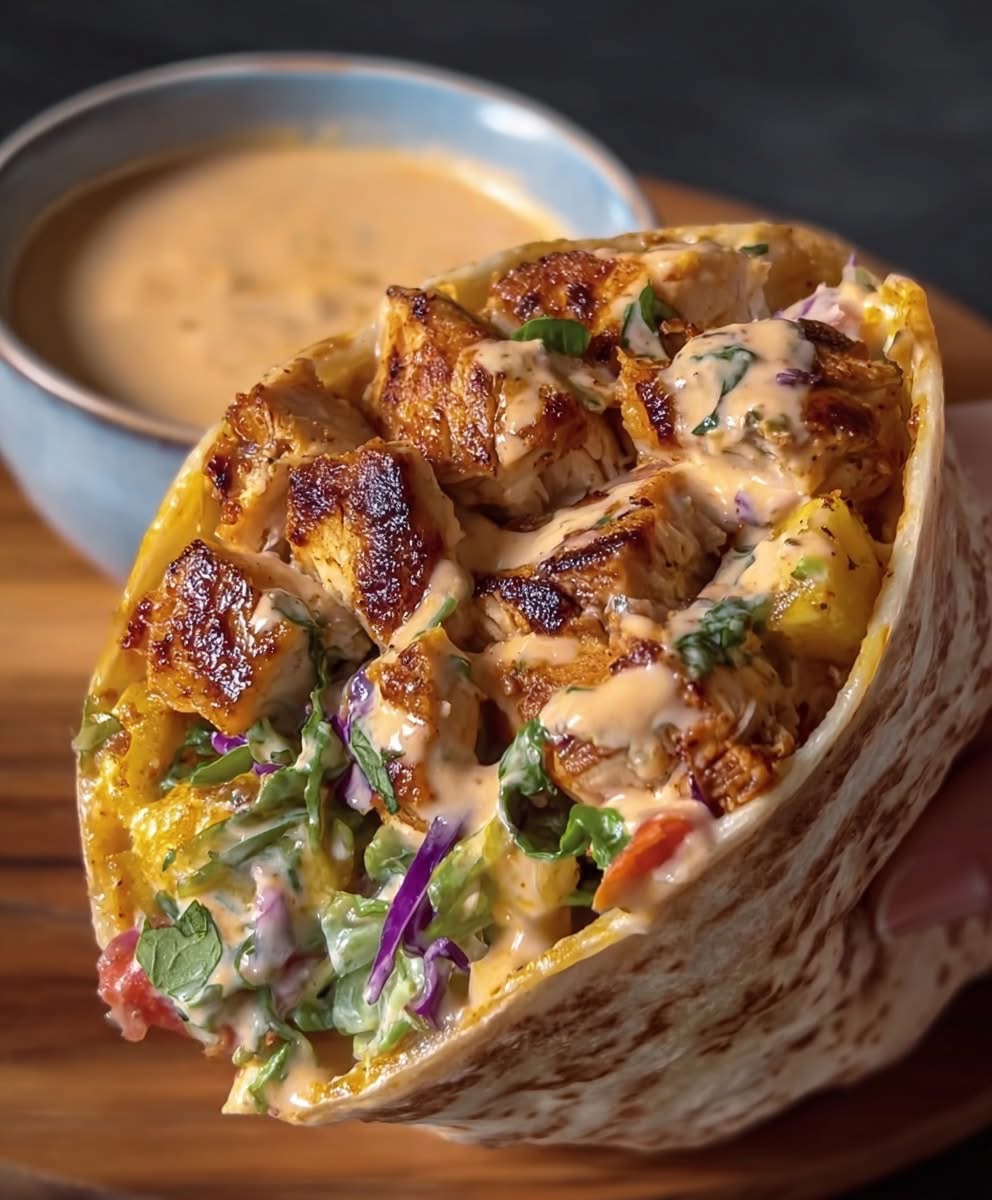
The Ultimate Smoky Chipotle Chicken Wrap is a restaurant-quality meal featuring juicy seasoned chicken, crisp vegetables, melted Monterey Jack cheese, and a signature creamy chipotle pepper sauce. This comprehensive guide covers everything from historical roots to precise assembly methods, specialized variations, and deep nutritional breakdowns.
1. Introduction & Culinary Philosophy
The modern wrap format bridges ancient flatbread traditions with fast-casual American dining convenience. This recipe elevates standard sandwich wraps by introducing layered textures and a balance of heat, smoke, acid, and fat.
Using specific techniques like dynamic skillet searing, fresh vegetable acid-treatment, and high-heat pressing ensures that each bite delivers maximum structural stability and culinary impact.
2. Historical & Cultural Context
The components of this dish trace back through generations of culinary evolution across North America.
The Origins of Chipotles
The word chipotle originates from the Nahuatl word chīlpoctli, meaning “smoked chili.” This preservation method was developed in Mesoamerica (modern-day Mexico) long before the Aztec Empire. Early civilizations smoked jalapeño peppers because their thick, fleshy walls resisted standard air-drying methods, causing them to rot before dehydrating fully. Smoking over slow wood fires preserved the peppers and imparted an intense, earthy depth of flavor.
Evolution of the Flour Tortilla
While corn was the foundational grain of ancient Mesoamerica, the introduction of wheat by Spanish explorers in the 16th century led to the creation of the flour tortilla in northern Mexico. Its high gluten content yielded a flexible, elastic dough capable of stretching thin without tearing. This elasticity laid the groundwork for wrapping large amounts of fillings securely.
The Birth of the Modern Wrap
The contemporary sandwich wrap emerged in California during the early 1990s. Heavily inspired by the traditional Mexican burrito, chefs in San Francisco and Los Angeles substituted standard fillings like rice and beans with grilled proteins, diverse leafy greens, and emulsion-based sauces. The format exploded globally as a convenient, portable alternative to traditional sliced-bread sandwiches.
3. Ingredients Profile
To achieve optimal flavor and texture, select high-quality ingredients based on the specifications below.
For the Smoky Chipotle Marinade & Sauce
- Chipotle Peppers in Adobo Sauce: 3 whole peppers plus 3 tablespoons of the canning sauce. Look for brands packing peppers in a rich, deeply maroon vinegar-and-tomato base.
- Mayonnaise: 1 cup of full-fat, oil-emulsified mayonnaise to serve as the creamy vehicle for the spicy peppers.
- Mexican Crema or Sour Cream: 1/2 cup to provide a tangy lactic acidity that cuts through the heat.
- Fresh Lime Juice: 2 tablespoons, freshly squeezed, to introduce bright citric acid.
- Garlic: 4 medium cloves, finely grated or crushed into a smooth paste.
- Smoked Paprika: 1 teaspoon to enhance the woody smoke profile.
- Ground Cumin: 1/2 teaspoon for a warm, earthy undertone.
- Kosher Salt & Black Pepper: To taste.
For the Grilled Chipotle Chicken
- Chicken Breast or Thighs: 1.5 pounds of boneless, skinless chicken, trimmed of excess fat and pounded to a uniform 1/2-inch thickness.
- Olive Oil: 2 tablespoons for searing and fat distribution.
- Chili Powder: 1 teaspoon.
- Garlic Powder: 1 teaspoon.
- Onion Powder: 1 teaspoon.
- Dried Oregano (preferably Mexican): 1/2 teaspoon.
For the Wrap Construction & Fresh Veggies
- Flour Tortillas: 4 extra-large (12-inch) burrito-sized tortillas. Choose brands that specify flexibility or “soft-skin” properties.
- Cheese: 2 cups of shredded Monterey Jack, Oaxaca, or Pepper Jack cheese.
- Romaine Lettuce: 2 cups, washed, thoroughly dried, and finely shredded.
- Roma Tomatoes: 2 medium tomatoes, cored, seeded, and diced small.
- Red Onion: 1/2 small onion, sliced into paper-thin half-moons.
- Avocado: 1 large Hass avocado, halved, pitted, and sliced thin.
4. Kitchen Tools & Equipment
Ensure you have the following gear clean and ready before cooking:
- High-Speed Blender or Food Processor: Vital for emulsifying the peppers into a smooth sauce.
- Cast-Iron Skillet or Griddle: Retains high heat effectively to produce a restaurant-style sear on the chicken.
- Meat Mallet & Plastic Wrap: For pounding the chicken down to a uniform thickness.
- Instant-Read Digital Thermometer: The most reliable tool to ensure chicken is safely cooked without drying out.
- Chef’s Knife & Heavy Wooden Cutting Board: For slicing vegetables and dicing hot proteins cleanly.
- Tongs: For turning chicken and handling warm tortillas safely.
5. Detailed Preparation & Step-by-Step Instructions
[Blend Sauce] ──> [Marinate & Sear Chicken] ──> [Rest & Slice Protein]
                                                       │
[Toast Wrap]  <──  [Layer Cheese & Hot Chicken] <──────┘
     │
[Add Veggies & Sauce] ──> [Fold & Roll Burrito-Style] ──> [Pan-Sear Final Wrap]
Step 1: Crafting the Signature Chipotle Sauce
- Add the mayonnaise, Mexican crema (or sour cream), whole chipotle peppers, adobo sauce, fresh lime juice, grated garlic, smoked paprika, ground cumin, salt, and pepper into your blender or food processor.
- Process on high speed for 45 to 60 seconds until completely smooth. The sauce should turn a uniform coral-pink color with no visible chunks of pepper skin.
- Taste the mixture. If you want more heat, blend in another pepper; if it needs more acid, add a splash of lime juice.
- Transfer the sauce to a glass jar, seal it tightly, and place it in the refrigerator. Letting it chill for at least 30 minutes allows the garlic and chili flavors to meld thoroughly.
Step 2: Prepping and Marinating the Chicken
- Place the chicken breasts between two sheets of plastic wrap on your cutting board.
- Use the flat side of a meat mallet to gently pound the thickest parts of the chicken until the entire piece is a uniform 1/2-inch thick. This step is essential for even cooking.
- In a large bowl, whisk together 2 tablespoons of olive oil, 2 tablespoons of your prepared chipotle sauce, the chili powder, garlic powder, onion powder, dried oregano, salt, and black pepper.
- Add the chicken to the bowl, turning each piece to coat it completely in the marinade.
- Cover the bowl and let it marinate at room temperature for 15 to 20 minutes, or store it in the refrigerator for up to 4 hours.
Step 3: Searing the Chicken to Perfection
- Set a heavy cast-iron skillet over medium-high heat and let it get hot for 3 to 4 minutes. Add a thin teaspoon of high-smoke-point oil if your pan isn’t fully seasoned.
- Remove the chicken from the marinade, letting any excess drip off. Lay the pieces flat in the hot skillet. Do not overcrowd the pan; cook in batches if necessary.
- Sear the chicken without moving it for 5 to 6 minutes. A deep, dark-red crust should form on the bottom.
- Flip the chicken using tongs. Cook the second side for another 4 to 5 minutes.
- Insert your digital meat thermometer into the thickest part of the meat. Once it registers exactly 165°F (74°C), remove the chicken from the pan immediately.
- Transfer the cooked chicken to a clean cutting board and let it rest undisturbed for 5 to 7 minutes. This allows the internal juices to redistribute instead of draining out onto the board.
- Slice the chicken across the grain into thin strips, then chop those strips into bite-sized cubes.
Step 4: Prepping the Vegetable Foundations
- Wash the Romaine lettuce thoroughly in cold water. Spin or pat it completely dry; excess water will make the wrap soggy. Shred it finely.
- Slice the Roma tomatoes in half, scoop out the watery seed pockets with a spoon, and dice the firm outer flesh.
- Peel and slice the red onion as thinly as possible.
- Slice the avocado just before assembling to prevent it from turning brown.
6. Structural Assembly & Structural Formation
Properly wrapping a large tortilla requires a specific technique to keep the fillings secure and ensure the wrap doesn’t fall apart while you eat it.
Step A: Layer fillings centered on the bottom third of the tortilla.
Step B: Fold the left and right sides tightly over the edges of the filling.
Step C: Bring the bottom flap up and over, tucking it snugly under the ingredients.
Step D: Roll forward firmly while keeping the sides tucked in tight.
The Heat Activation Method
Never attempt to roll a cold or room-temperature flour tortilla straight out of the package. Cold gluten is brittle, which causes the tortilla to crack and tear under pressure.
- To fix this, heat a large dry skillet over medium heat.
- Warm each tortilla for 15 to 20 seconds per side until it becomes soft, warm, and highly flexible.
Layering for Maximum Stability
Lay the warmed tortilla flat on a clean workspace. Arrange your ingredients in a neat rectangular pile across the lower third of the tortilla, leaving at least 2 inches of open space on the bottom and sides. Layer the ingredients in this exact order:
- The Cheese Foundation: Place a half-cup of shredded cheese directly onto the warm tortilla.
- The Hot Protein: Pile the hot, freshly diced chicken right on top of the cheese. The ambient heat from the chicken will melt the cheese from the top down, acting as a delicious edible glue that anchors the wrap together.
- The Creamy Layer: Drizzle 2 tablespoons of the chilled chipotle sauce over the hot chicken.
- The Crisp Texture: Add the shredded Romaine lettuce, diced tomatoes, and thin red onion slices.
- The Rich Finish: Top the vegetables with a few slices of fresh avocado.
The Perfect Burrito Fold Technique
- Side Lock: Fold the left and right sides of the tortilla inward over the ends of the filling pile.
- Bottom Wrap: Pick up the bottom edge of the tortilla closest to you. Pull it up and over the fillings, keeping the side folds tucked in tightly.
- The Snug Roll: Gently pull the entire bundle backward toward you slightly to pack the fillings tightly together.
- The Final Roll: Roll the bundle forward away from you until the top seam of the tortilla is flat against the board on the bottom.
The Final Skillet Sear
To lock your wrap together and add a satisfying crunch, return your skillet to medium heat. Lay the assembled wrap seam-side down directly onto the hot pan. Press down gently with a spatula for 1 to 2 minutes until the seam is sealed shut and turns a golden, crispy brown. Flip and toast the top side for another 60 seconds.
7. Advanced Culinary Variations
You can easily adapt this foundational recipe to suit different dietary preferences and regional flavors.
Culinary Variations Comparison
| Variation Name | Primary Protein | Core Sauce Adjustment | Texture Factor | Diet Category |
|---|---|---|---|---|
| Baja Seafood Sizzle | Grilled Lime Shrimp | Adobo + Cotija Cheese | Shredded Cabbage | Seafood / Pescatarian |
| The Green Field | Firm Pressed Tofu | Cashew-Mayo Chipotle | Crisp Alfalfa Sprouts | Plant-Based / Vegan |
| The Smokehouse | Smoked Pulled Pork | Sweet BBQ-Chipotle | Fried Onion Straws | Meat-Centric / Fusion |
The Baja Seafood Sizzle Wrap
Swap out the chicken for jumbo wild-caught shrimp tossed in lime zest and sea salt. Sear the shrimp in a hot skillet for just 2 minutes per side until they turn pink and opaque. Swap the Romaine lettuce for a crunchy green cabbage slaw, and add a handful of chopped fresh cilantro to finish.
The Green Field Plant-Based Wrap
To make a vegan version, press a block of extra-firm tofu to remove excess water, cut it into cubes, and toss it with cornstarch and your dry spices. Bake or air-fry the tofu at 400°F (204°C) until it’s extra crispy. Make the chipotle sauce using an egg-free, plant-based vegan mayonnaise and dairy-free sour cream alternative.
The Smokehouse Pork Fusion Wrap
For a rich, smoky twist, use tender shredded pulled pork as your protein. Mix 2 tablespoons of your favorite sweet barbecue sauce into the chipotle cream sauce. Replace the raw red onion with quick-pickled red onions to add a bright, tangy pop that cuts through the rich pork.
8. Nutritional Science & Dietary Analytics
This breakdown represents the nutritional profile for one standard 12-inch wrap made with a flour tortilla, grilled chicken breast, Monterey Jack cheese, fresh vegetables, and 2 tablespoons of chipotle sauce.
Macronutrient Distribution
- Total Energy: 680 Calories
- Protein: 46 grams (Essential for muscle repair and long-lasting fullness)
- Carbohydrates: 48 grams (Provides steady energy; includes 4 grams of dietary fiber)
- Total Fat: 32 grams (Saturated Fat: 11g, Monounsaturated Fat: 14g)
Micronutrient Profile
- Vitamin A: 25% of the Daily Value (DV), primarily from the fresh Romaine lettuce and chipotle peppers.
- Vitamin C: 30% of the DV, driven by the fresh lime juice and diced tomatoes.
- Calcium: 35% of the DV, provided by the melted Monterey Jack cheese.
- Iron: 20% of the DV, found across the flour tortilla, chicken, and greens.
- Sodium: 1,120 mg (Largely from the store-bought tortilla and adobo canning sauce).
9. Health & Wellness Benefits
Enjoying this wrap provides several key nutritional and physiological benefits:
- High-Density Lean Protein: Chicken breast is packed with lean protein, which helps keep you full and satisfied by regulating your hunger hormones.
- Capsaicin Boost: Chipotle peppers contain capsaicin, the natural compound that gives chilis their heat. Capsaicin has been shown to temporarily boost metabolism and help reduce inflammation.
- Healthy Monounsaturated Fats: The fresh avocado provides heart-healthy fats that help your body absorb fat-soluble vitamins like Vitamin A and E from the fresh greens.
- Antioxidant Support: Lycopene from the diced tomatoes and sulfur compounds from the red onion help support your immune system and protect your cells.
10. For the True Lovers of Spice & Crunch
If you love extra heat and texture, try these easy upgrades to take your wrap to the next level:
For the Extreme Spice Fan
The standard adobo sauce delivers a medium, family-friendly kick. If you want real heat, fold a finely minced fresh jalapeño or serrano pepper right into the vegetable mix. You can also add a few shakes of habanero-infused hot sauce over the chicken before rolling.
For the Texture Fanatic
To maximize the crunch, crush a handful of premium salted tortilla chips or blue corn chips and scatter them over the lettuce just before rolling. The contrast between the crunchy chips, juicy chicken, and creamy sauce makes every bite amazing.
11. Meal Prep, Advanced Storage, & Food Safety
This recipe is fantastic for meal prep if you store the hot and cold components separately to prevent the wrap from getting soggy.
Smart Meal Prep Storage
- The Protein: Dice your cooked chicken and store it in an airtight glass container in the fridge for up to 4 days.
- The Sauce: Keep the chipotle sauce in a sealed jar in the refrigerator. It stays fresh and flavorful for up to 10 days.
- The Veggies: Chop your lettuce, onion, and tomatoes, and store them together in a separate container lined with a paper towel to absorb any extra moisture. Don’t slice your avocado ahead of time; save that for the day you eat the wrap.
Fast Assembly and Reheating
When you’re ready for lunch or dinner, warm up just the prepped chicken in a skillet or microwave until it’s hot. Warm your tortilla, add the melted cheese and hot chicken, layer your cold veggies and chilled sauce, and roll it up. Finish with a quick sear in a hot pan for a fresh, restaurant-quality meal in minutes.
12. Culinary Conclusion
The Ultimate Smoky Chipotle Chicken Wrap is a perfect example of how simple ingredients can create an incredible meal when you use the right techniques. By building flavor at every step—from marinating and searing the chicken to properly warming and folding the tortilla—you get a perfectly balanced, portable meal that outshines any fast-casual restaurant version.
If you want to tailor this further, let me know:
- Your preferred spice tolerance level (mild, medium, or extreme)
- If you need to swap ingredients for a specific dietary restriction (like gluten-free or low-carb)
- If you are preparing this for a large group or single meal
I can adjust the ingredient amounts and prep steps to match your exact kitchen setup!