Peanut Butter Cookies: The Classic Crosshatch Comfort
A Humble Legend with a Rich History
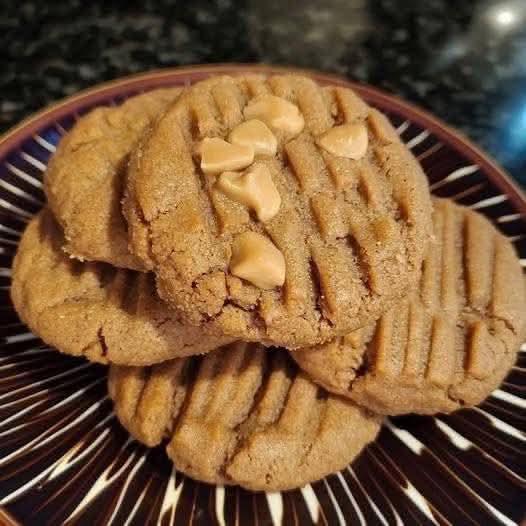
Few cookies inspire as much immediate, nostalgic warmth as the humble peanut butter cookie. With its signature crosshatch pattern pressed into the dough by the tines of a fork, its crumbly-yet-tender texture, and its deep, roasted, salty-sweet flavor, this cookie holds a cherished place in the American baking canon. It emerged in the early twentieth century, shortly after peanut butter itself was popularized as a protein-rich health food at the 1904 St. Louis World’s Fair. By the 1910s and 1920s, home bakers began experimenting with peanut butter in drop cookies, and the now-iconic fork pattern appeared as a practical solution to the dough’s dense, stiff nature—the tines helped flatten the cookies evenly while creating a decorative, easily recognizable finish.
Unlike the delicate French macaron or the elaborately decorated sugar cookie, the peanut butter cookie makes no pretense of fussy elegance. Its beauty lies in honest simplicity: a handful of pantry staples transformed into a chewy, nutty, deeply satisfying treat. It is the cookie of school lunchboxes, of rainy afternoons in grandmother’s kitchen, of bake sales and church socials. And when executed with care—balancing the ratio of peanut butter to flour, chilling the dough properly, and pulling the cookies from the oven just as the edges turn golden—it transcends nostalgia to become a genuinely superb piece of baking craftsmanship.
The Anatomy of a Perfect Peanut Butter Cookie
What distinguishes an average peanut butter cookie from an exceptional one? The answer lies in four key attributes: texture, flavor depth, crumb structure, and that distinctive visual signature.
Texture: The ideal peanut butter cookie should offer a gentle tug when bitten—slightly chewy at the center, with crisp, golden edges that crumble delicately. It should not be dry, sandy, or cakey (common faults of over-measured flour or over-baking). Nor should it be greasy or overly soft, which indicates excessive butter or insufficient structure.
Flavor Depth: Peanut butter alone, while delicious, benefits from amplification. A great recipe employs brown sugar for its molasses notes, vanilla extract for aromatic warmth, and a measured amount of salt—not just in the dough but often sprinkled lightly over the tops before baking—to heighten the roasted, nutty qualities. Some bakers include a touch of cinnamon or even a pinch of espresso powder to deepen the flavor without announcing themselves directly.
Crumb Structure: The perfect peanut butter cookie holds together without crumbling into dust upon first bite. It should feel substantial but not heavy, with a tender, slightly sandy crumb that melts on the tongue. This structure comes from the right balance of fats (butter and peanut butter) to flour, and from creaming the butter and sugars thoroughly to incorporate air.
The Crosshatch Pattern: Those iconic fork marks are not decorative alone. Pressing the dough down with a fork dipped in granulated sugar (or flour, though sugar adds a pleasant sparkle) ensures even thickness and uniform baking. The shallow grooves also create additional edges and surface area, which means more caramelization and a more interesting texture per bite.
Ingredient Deep Dive: Choosing Wisely
Quality ingredients matter enormously in a recipe this simple. Here is what to look for:
· Peanut Butter: This is the star, so choose wisely. Conventional smooth, commercial peanut butter (like Skippy or Jif) contains sugar, hydrogenated oils, and stabilizers, which produce a reliably soft, chewy cookie with a classic sweet flavor. Natural peanut butter (ingredients: peanuts and salt only, often with oil separation) creates a more intensely peanut-forward cookie but can lead to excessive spreading or greasiness unless the oil is thoroughly stirred back in and the dough is chilled. Crunchy peanut butter adds delightful pockets of texture. For the purest, most roasted flavor, some bakers grind fresh peanuts in a food processor.
· Butter: Unsalted, high-quality butter (82% butterfat or higher) is essential. Salted butter varies in salt content and can throw off the balance. The butter should be softened to cool room temperature—pliable but not greasy or melted—to cream properly with the sugars.
· Sugars: A blend of granulated white sugar (for crispness and spread) and light or dark brown sugar (for moisture, chewiness, and molasses complexity) is standard. Dark brown sugar yields a deeper, almost toffee-like note.
· Egg: One large egg provides structure, moisture, and richness. An extra egg yolk (discarding the white) makes for an even denser, chewier cookie.
· Flour: All-purpose flour (approximately 10–12% protein) is ideal. Too much flour makes dry, crumbly cookies; too little makes flat, greasy ones. Measuring by weight (grams) rather than volume (cups) is strongly recommended.
· Leavening: Baking soda, not baking powder, is traditional. It reacts with the acidic components in brown sugar and peanut butter to produce a modest rise and, crucially, promotes browning and a slightly craggy surface.
· Vanilla and Salt: Pure vanilla extract rounds out the flavors. A pinch of fine sea salt in the dough, plus flaky salt on top after baking, transforms the cookie from merely sweet into something profoundly savory-sweet.
The Classic Recipe (Yield: Approximately 24–30 cookies)
Ingredients
Dry Ingredients
· 240 g (2 cups) all-purpose flour (spooned and leveled, or better, weighed)
· 1 teaspoon baking soda
· ½ teaspoon fine sea salt
Wet Ingredients & Sugars
· 115 g (½ cup or 1 stick) unsalted butter, softened to cool room temperature
· 200 g (1 cup) packed light brown sugar
· 100 g (½ cup) granulated white sugar, plus ¼ cup extra for forking
· 200 g (¾ cup) smooth peanut butter (commercial or well-stirred natural)
· 1 large egg, at room temperature
· 1 large egg yolk (optional, for extra chewiness)
· 2 teaspoons pure vanilla extract
For Finishing (Optional but Recommended)
· Flaky sea salt (e.g., Maldon)
Method: Step-by-Step
Step 1 – Preheat and Prepare
Preheat your oven to 180°C (350°F). Line two large baking sheets with parchment paper or silicone baking mats. Do not grease the paper; the cookies have sufficient fat.
Step 2 – Combine Dry Ingredients
In a medium bowl, whisk together the all-purpose flour, baking soda, and fine sea salt. Set aside.
Step 3 – Cream Butter and Sugars
In a large mixing bowl (using a stand mixer fitted with the paddle attachment or a hand mixer), beat the softened butter, brown sugar, and granulated sugar together on medium speed for 2 to 3 minutes. The mixture should become light, pale, and fluffy. Do not shortcut this step; proper creaming incorporates air, which affects texture.
Step 4 – Incorporate Peanut Butter, Egg, and Vanilla
Add the peanut butter and beat on medium speed until fully combined and smooth, about 1 minute. Scrape down the sides and bottom of the bowl. Add the egg (plus the extra yolk if using) and vanilla extract, then beat again until just incorporated. The mixture may look slightly curdled at this point—this is normal.
Step 5 – Add Dry Ingredients
Reduce mixer speed to low. Gradually add the flour mixture, mixing just until the last streaks of flour disappear. Over-mixing develops gluten, leading to tough cookies. The dough will be thick, soft, and slightly sticky.
Step 6 – Chill the Dough (Crucial Step)
Cover the bowl with plastic wrap and refrigerate for at least 30 minutes, preferably 2 hours. Chilling solidifies the fat, prevents excessive spreading, and deepens the flavor. For best results, chill overnight.
Step 7 – Shape and Mark
Preheat the oven again if it has cooled. Pour the extra ¼ cup granulated sugar into a small bowl. Scoop rounded tablespoons of chilled dough (about 20–25 grams each) and roll them into smooth balls. Roll each ball in the granulated sugar to coat lightly. Place the dough balls on the prepared baking sheets, spacing them at least 5 cm (2 inches) apart. Dip a dinner fork into the sugar (to prevent sticking). Press the fork tines into each dough ball twice, in perpendicular directions, to create the classic crosshatch pattern. The cookies should flatten to about 1 cm (½ inch) thickness.
Step 8 – Bake
Bake one sheet at a time on the middle oven rack for 10 to 12 minutes. The cookies are done when the edges are set and lightly golden brown; the centers may still appear slightly soft and puffed. Do not wait until the centers look firm—they will continue to set as they cool on the sheet.
Step 9 – Cool and Finish
Remove the baking sheet from the oven. Immediately sprinkle a few flakes of sea salt over each warm cookie (if desired). Let the cookies rest on the sheet for 5 minutes—this allows them to set up properly. Then transfer them to a wire rack to cool completely. The cookies will firm up into their final texture as they cool.
Variations and Creative Twists
Once you have mastered the classic, consider these inspired variations:
· Chocolate Peanut Butter Swirl: After portioning the dough, press a small, chilled chunk of dark chocolate (or a teaspoon of chocolate chips) into the center of each ball before forking. Or, melt dark chocolate and drizzle it over the cooled cookies.
· Peanut Butter Blossoms: Bake the plain peanut butter cookies as directed. Immediately after removing from the oven, press a milk chocolate or dark chocolate kiss into the center of each warm cookie. Let cool completely to set the chocolate.
· Gluten-Free Peanut Butter Cookies: Replace the all-purpose flour with a 1:1 gluten-free baking blend (containing xanthan gum). Alternatively, use a classic flourless recipe: 1 cup peanut butter, 1 cup sugar, 1 egg, and 1 teaspoon vanilla—though these are much more tender and brittle.
· Spiced Peanut Butter: Add ½ teaspoon ground cinnamon, ¼ teaspoon ground ginger, and a pinch of freshly grated nutmeg to the dry ingredients.
· Salted Honey Peanut Butter: Replace 50 g (¼ cup) of the granulated sugar with 60 ml (¼ cup) of mild honey. Reduce the brown sugar slightly to compensate for additional moisture, and increase the flour by 15 g (2 tablespoons). The result is a softer, more aromatic cookie.
· Peanut Butter & Oatmeal: Replace half the flour (120 g) with 120 g of old-fashioned rolled oats. Add ¼ teaspoon of ground cinnamon. The texture becomes heartier and more rustic.
Storage and Shelf Life
· Room Temperature: Store baked peanut butter cookies in an airtight container at room temperature for up to one week. Placing a slice of plain bread in the container helps maintain softness; the cookies absorb moisture from the bread.
· Freezing Baked Cookies: Cooled cookies freeze well for up to three months. Layer them between sheets of parchment paper in a freezer-safe container. Thaw at room temperature for 15–20 minutes before serving.
· Freezing Raw Dough: Peanut butter cookie dough freezes beautifully. Roll the dough into balls, place them on a parchment-lined baking sheet, and freeze until solid. Transfer the frozen dough balls to a zip-top freezer bag. Bake directly from frozen, adding 2–3 extra minutes to the baking time. No need to thaw.
Troubleshooting Common Problems
Problem Likely Cause Solution
Cookies spread too thin, greasy Dough too warm; butter too soft; natural peanut butter with excess oil Chill dough thoroughly; use stabilized commercial peanut butter or drain oil from natural
Cookies are dry and crumbly Too much flour; over-baked; insufficient fat Measure flour by weight; pull cookies from oven when edges are just golden, not brown
Cookies are cakey and puffy Too much leavening; too much egg; over-mixed dough Reduce baking soda by ¼ teaspoon; use only one egg; mix dry ingredients just until combined
Fork pattern disappears during baking Dough too soft; insufficient chilling Chill dough for at least 2 hours before shaping and pressing
Burnt bottoms Baking sheet too dark; oven rack too low; too much sugar Use light-colored, heavy-gauge baking sheets; bake on middle rack; reduce sugar slightly
A Final Word
The peanut butter cookie, at its finest, is a quiet masterpiece. It asks for no elaborate decoration, no exotic ingredients, no lengthy fermentation or complicated folds. It asks only for attention to detail: properly softened butter, accurately measured flour, a patient chill in the refrigerator, and an oven at the right temperature. When those simple conditions are met, the result is a cookie that is golden at the edges, tender at the center, deeply peanutty, and just salty enough to make you reach for another. It is the cookie that reminds us why the simplest things, done well, are often the most satisfying.