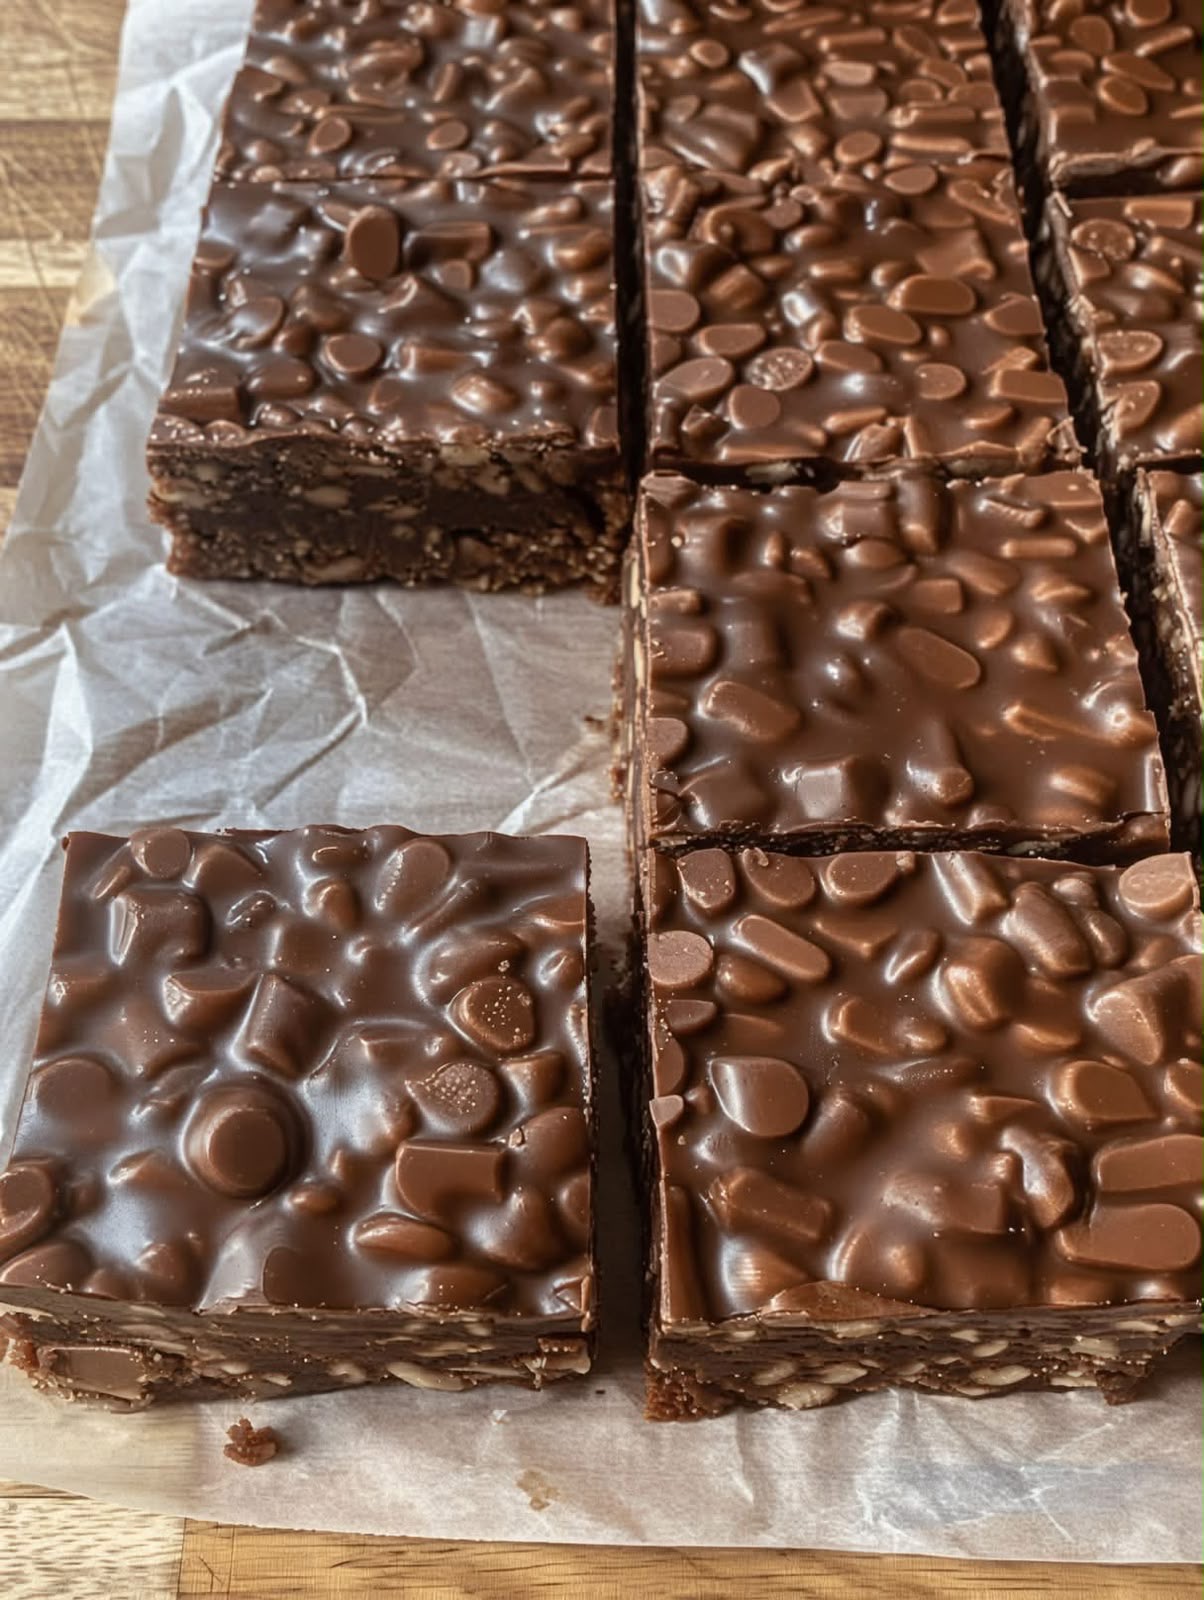
No-bake chocolate oat bars are a rich, easy dessert with a chewy oat layer and a smooth chocolate topping. They are made with simple pantry ingredients, require no oven, and chill into neat squares that are perfect for sharing. The combination of chocolate, oats, butter, and a little sweetness creates a comforting homemade treat with a satisfying texture.
These chocolate oat bars are ideal for busy days, holiday dessert trays, lunchbox treats, potlucks, or whenever you want a simple no-bake dessert recipe. The glossy chocolate layer on top gives them a bakery-style finish, while the oat base makes every bite pleasantly chewy and hearty.
Why You’ll Love This Recipe
This recipe is easy because it does not require baking, special equipment, or complicated techniques. You can prepare the oat mixture on the stovetop, press it into a pan, add the chocolate topping, and let the refrigerator do the rest.
The bars are also easy to customize. You can add peanut butter, chopped nuts, coconut, dried fruit, or different kinds of chocolate chips. They keep well in the refrigerator and can be cut into small or large squares depending on whether you are serving them as a snack or dessert.
Recipe Information
Preparation time for no-bake chocolate oat bars is about 20 minutes. Chilling time is approximately two hours. The total time is around two hours and 20 minutes. This recipe makes 16 medium bars. The difficulty level is easy.
Main Ingredients Explained
Old-fashioned rolled oats create the chewy base of these bars. They have a better texture than quick oats and hold their shape after chilling. Rolled oats also give the dessert a hearty bite that balances the richness of the chocolate topping.
Butter helps bind the oat mixture and creates a smooth, rich flavor. Brown sugar adds a light caramel taste, while honey or corn syrup helps the base hold together after chilling. A small amount of peanut butter adds a creamy nutty flavor and makes the oat layer less crumbly.
Chocolate chips create the glossy top layer. Semi-sweet chocolate chips give a balanced chocolate flavor, while milk chocolate makes the bars sweeter and darker chocolate creates a richer taste. A little butter or coconut oil helps the chocolate melt smoothly and makes it easier to slice.
Simple Recipe Overview
Start by melting butter, brown sugar, and honey in a saucepan. Stir in oats and peanut butter until the mixture is thick and evenly coated. Press most of the mixture into a lined baking pan to create the bottom layer.
Melt chocolate chips with a little butter, spread the chocolate over the oat base, then add the remaining oat mixture on top if desired. Chill the bars until firm, then slice them into squares. The result is a rich, chewy, no-bake dessert that looks impressive but is very simple to make.
Ingredients
For these no-bake chocolate oat bars, you will need 3 cups old-fashioned rolled oats, 1 cup unsalted butter, ½ cup packed brown sugar, ⅓ cup honey or light corn syrup, ½ cup creamy peanut butter, 1 teaspoon vanilla extract, ¼ teaspoon salt, 2 cups semi-sweet chocolate chips, 2 tablespoons butter or coconut oil for melting the chocolate, and ½ cup extra chocolate chips for the topping if desired. You can also add ½ cup chopped walnuts, pecans, peanuts, or coconut flakes if you enjoy extra texture.
How to Choose the Best Ingredients
Use old-fashioned rolled oats rather than instant oats. Rolled oats give the bars their chewy texture and remain visible in each slice. Instant oats can become too soft and may make the base less structured.
Choose a peanut butter that is smooth and easy to stir. Regular creamy peanut butter works best because it blends evenly into the warm oat mixture. Natural peanut butter can be used, but stir it very well before measuring because the oil can separate.
Use good-quality chocolate chips that melt smoothly. Semi-sweet chocolate is usually the best choice because it gives a rich flavor without making the bars overly sweet. If you prefer a sweeter dessert, use milk chocolate chips. For a darker taste, use dark chocolate chips.
Preparing the Baking Pan
Use an 8-by-8-inch or 9-by-9-inch square baking pan. Line it with parchment paper, leaving enough paper hanging over the sides to create handles. These parchment handles make it much easier to lift the chilled bars out of the pan before slicing.
Lightly press the parchment paper into the corners so the base stays neat. If the parchment slides around, use a tiny amount of butter or cooking spray under it to help it stay in place.
Set the prepared pan aside while you make the oat mixture. Having the pan ready is important because the warm mixture begins to set as it cools.
Preparing the Oat Mixture
Place the butter, brown sugar, and honey in a medium saucepan over medium-low heat. Stir until the butter melts and the sugar begins to dissolve. Do not let the mixture boil aggressively. A gentle bubble is enough to combine the ingredients and create a smooth base.
Once the mixture is warm and smooth, remove the saucepan from the heat. Add the peanut butter, vanilla extract, and salt. Stir until the peanut butter has melted into the butter mixture and everything looks creamy.
Add the rolled oats gradually, stirring well after each addition. The oats should be fully coated in the sweet buttery mixture. If you are adding chopped nuts, coconut, or dried fruit, stir them in now.
Preparing the Chocolate Layer
Place the chocolate chips and two tablespoons of butter or coconut oil in a microwave-safe bowl. Heat in short 20-second intervals, stirring after each interval, until the chocolate is almost melted. Then stir until completely smooth.
You can also melt the chocolate in a heat-safe bowl placed over a pot of gently simmering water. Keep the bottom of the bowl from touching the water and stir until the chocolate is smooth. Avoid overheating the chocolate because it can become thick or grainy.
Once melted, the chocolate should be glossy and easy to spread. If it seems too thick, stir in a small amount of coconut oil or butter until smooth.
Step-by-Step Instructions
Press about two-thirds of the warm oat mixture firmly into the bottom of the prepared baking pan. Use the back of a spoon, a flat measuring cup, or clean hands to create an even layer. Press gently but firmly so the base holds together after chilling.
Pour the melted chocolate over the oat layer. Use a spatula or the back of a spoon to spread it evenly from edge to edge. If you want a smooth top, leave the chocolate plain. If you want a more textured look, sprinkle extra chocolate chips over the warm chocolate layer.
Crumble the remaining oat mixture over the top of the chocolate, leaving some areas of chocolate visible. This creates a layered, rustic look and adds extra chewiness. You can also leave the chocolate uncovered and use all the oats in the bottom layer if you prefer a cleaner chocolate topping.
Place the pan in the refrigerator and chill for at least two hours, or until the chocolate is firm and the bars hold their shape. For faster chilling, place the pan in the freezer for 30 to 40 minutes, but do not leave it there too long or the bars may become very hard to slice.
Lift the chilled dessert from the pan using the parchment paper handles. Place it on a cutting board and use a sharp knife to cut it into 16 squares. Wipe the knife clean between cuts for neat edges.
Tips for the Best Result
Press the oat base firmly into the pan. A loose base can crumble when sliced, while a firm, even layer creates neat bars that hold their shape. Use parchment paper to make removing the bars easier.
Let the chocolate cool slightly before adding the final oat topping. If the chocolate is extremely hot, it may melt the oat mixture and make the layers blend together. A slightly cooled chocolate layer keeps the dessert looking more defined.
Chill the bars fully before slicing. The chocolate needs time to set, and the oat layers need time to firm up. Cutting too early can cause the bars to break or the chocolate to smear.
Common Mistakes to Avoid
Avoid using quick oats if you want a chewy texture. Quick oats absorb liquid rapidly and can make the base softer than intended. Old-fashioned rolled oats give the best structure and appearance.
Do not boil the butter and sugar mixture for too long. Overheating can make the base dry or overly hard after chilling. Warm the ingredients just enough to melt and combine them smoothly.
Avoid overheating the chocolate. Melt it gently in short intervals and stir often. Chocolate that becomes too hot can seize, turn grainy, or lose its smooth glossy texture.
Flavor Variations
For peanut butter chocolate oat bars, increase the peanut butter to ¾ cup and use milk chocolate chips. This creates a sweeter, creamier dessert with a classic peanut butter and chocolate flavor.
For a nutty version, stir chopped walnuts, pecans, almonds, or peanuts into the oat mixture. Nuts add crunch and make the bars especially good for holiday dessert trays or homemade gift boxes.
For coconut chocolate bars, add shredded coconut to the oat mixture and sprinkle toasted coconut over the chocolate topping. Coconut gives the dessert a sweet, tropical flavor and a slightly chewy texture.
For salted chocolate oat bars, sprinkle a very small pinch of flaky sea salt over the chocolate before it sets. The light saltiness balances the sweetness and makes the chocolate flavor stand out.
How to Serve No-Bake Chocolate Oat Bars
Serve these bars chilled or allow them to sit at room temperature for about 10 minutes before serving. They are delicious with coffee, tea, milk, hot chocolate, or a cold glass of lemonade.
For a dessert plate, serve a square with a scoop of vanilla ice cream, fresh berries, or a small drizzle of warm chocolate sauce. The bars are rich, so smaller pieces are often perfect for parties and gatherings.
They also work well for lunchboxes, road trips, picnics, and casual snack trays. Keep them cool if the weather is warm so the chocolate layer stays firm.
Meal Prep and Storage
No-bake chocolate oat bars are excellent for make-ahead desserts. Store them in an airtight container in the refrigerator for up to one week. Place parchment paper between layers if you stack them, as the chocolate top can stick slightly when warm.
For the best texture, remove only the number of bars you plan to serve and keep the rest chilled. This prevents the chocolate from becoming too soft at room temperature.
If the bars become very firm in the refrigerator, let them sit on the counter for five to 10 minutes before eating. This softens the oat layer slightly and makes them easier to bite.
Freezing Instructions
These chocolate oat bars freeze very well. Cut them into squares after chilling, then place them in a freezer-safe container with parchment paper between layers. Freeze for up to two months.
To serve, thaw the bars in the refrigerator or at room temperature for about 20 to 30 minutes. Freezing is a useful option for preparing desserts ahead of holidays, gatherings, or busy weeks.
Reheating Instructions
These no-bake bars do not need reheating. They are designed to be served chilled or slightly softened at room temperature. If you want a softer texture, let one bar rest at room temperature for 10 minutes before serving.
Avoid microwaving the bars for long periods because the chocolate topping can melt quickly and lose its firm texture. If necessary, warm one bar for only a few seconds to soften it slightly.
Frequently Asked Questions
Can I make these chocolate oat bars without peanut butter? Yes. You can replace peanut butter with almond butter, sunflower seed butter, cookie butter, or another creamy nut-free spread. The flavor will change slightly, but the bars will still be delicious.
Can I use dark chocolate instead of semi-sweet chocolate? Yes. Dark chocolate works well and creates a richer, less sweet topping. You may want to add an extra tablespoon of honey or brown sugar to the oat base if you prefer a sweeter overall dessert.
Why are my bars crumbly? The oat base may not have been pressed firmly enough, or the butter and sweetener mixture may not have coated the oats evenly. Press the base firmly into the pan and stir the oat mixture thoroughly before layering.
Why is my chocolate layer too soft? The chocolate may need more chilling time, or the room may be warm. Store the bars in the refrigerator and allow the chocolate to set fully before slicing.
Can I add protein powder to the bars? Yes, but add only a small amount, such as two tablespoons, and mix it into the oat mixture after removing the saucepan from heat. Adding too much can make the bars dry and crumbly.
Final Thoughts
No-bake chocolate oat bars are a simple, rich, and satisfying dessert that combines chewy oats with smooth chocolate in every square. They are easy enough for everyday baking but look beautiful on a party platter or holiday dessert table.
Make them with your favorite chocolate, add nuts or coconut, or keep them simple with a glossy chocolate topping. With easy ingredients, no oven required, and a delicious homemade flavor, these chocolate oat bars are a recipe worth saving.