Introduction
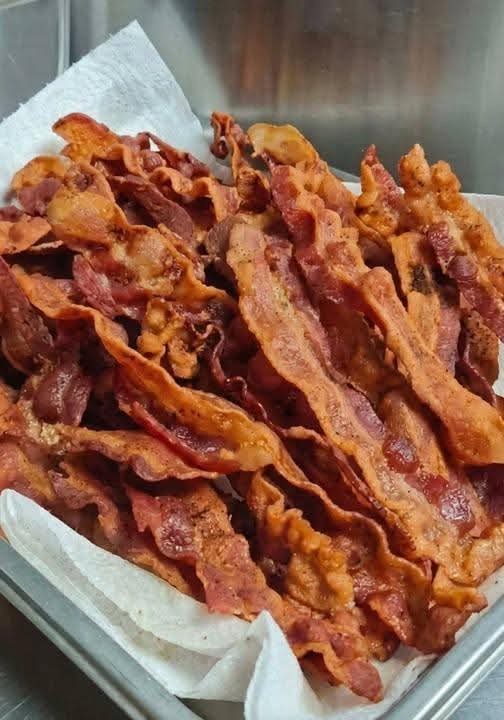
Crispy Oven-Baked Bacon is one of the easiest ways to prepare a large batch of perfectly cooked bacon without standing over a hot skillet. The oven provides steady heat, allowing the strips to cook evenly while the fat slowly renders away.
The result is beautifully browned bacon with crisp edges and a satisfying texture. This method is especially convenient when preparing breakfast for a family, making bacon for sandwiches, or cooking a batch ahead for salads, casseroles, burgers, and other recipes.
Why You Will Love This Recipe
Oven-baked bacon requires very little hands-on work. There is no need to continuously flip strips in a frying pan, and you can cook considerably more bacon at one time.
Cleanup can also be easier when the baking sheet is lined with aluminum foil or parchment paper.
Another advantage is consistency. Because every strip receives steady oven heat, you can easily choose between slightly chewy bacon and deeply crisp bacon simply by adjusting the cooking time.
Recipe Information
Prep Time: 5 minutes
Cook Time: 15–25 minutes
Total Time: 20–30 minutes
Servings: 6–8
Difficulty: Easy
Main Ingredients
Bacon: Regular-cut bacon becomes especially crisp, while thick-cut bacon produces a meatier texture and usually requires several additional minutes.
Black pepper: Optional, but freshly ground pepper adds a savory bite.
Brown sugar: Also optional. A small amount creates a sweet-and-salty candied variation.
Ingredients
1–2 pounds sliced bacon
Freshly ground black pepper, optional
1–2 tablespoons light brown sugar, optional for sweet bacon
¼ teaspoon smoked paprika, optional
Paper towels for draining
How to Choose the Best Bacon
Choose bacon with a fairly even balance of meat and fat. The fat renders during baking and helps produce the crisp texture.
Regular-cut bacon is a good choice when you want very crunchy strips. Thick-cut bacon is better if you prefer bacon that is crisp around the edges but still slightly chewy through the center.
Prepare the Bacon
Preheat the oven to 400°F (205°C).
Line a large rimmed baking sheet with aluminum foil or parchment paper. A rimmed pan is important because bacon releases a significant amount of hot fat while cooking.
Separate the bacon strips carefully.
Arrange them in a single layer across the prepared baking sheet. The strips can sit close together, but avoid heavily overlapping them.
Prepare the Remaining Ingredients
For classic bacon, nothing else needs to be added.
For peppered bacon, sprinkle freshly ground black pepper lightly over the strips.
For a sweet variation, sprinkle a very thin layer of brown sugar over each piece before baking.
Step-by-Step Instructions
Place the prepared baking sheet on the center oven rack.
Bake regular-cut bacon for approximately 15–20 minutes.
Thicker bacon may require approximately 20–25 minutes or longer, depending on its thickness and your preferred crispness.
Begin checking several minutes early because bacon can change from perfectly browned to overcooked quickly.
Once the strips are deeply golden and crisp, carefully remove the baking sheet from the oven.
Transfer the bacon to a plate or tray lined with paper towels.
Allow it to drain for 2–3 minutes. The bacon will become slightly crispier as it cools.
Serve warm.
Tips for Extra-Crispy Bacon
Start checking the bacon before the estimated cooking time is finished because different brands and thicknesses cook at different speeds.
Keep the strips in a single layer for more even browning.
For especially crisp bacon, place an oven-safe wire rack over the rimmed baking sheet and arrange the strips on the rack. This allows rendered fat to drip underneath.
Do not discard hot bacon grease directly into the sink. Allow it to cool first.
Flavor Variations
For maple bacon, lightly brush the strips with pure maple syrup during the final few minutes.
For sweet pepper bacon, combine brown sugar with freshly cracked black pepper.
A small sprinkle of smoked paprika adds deeper smoky flavor.
For a spicy-sweet version, combine a little brown sugar with a pinch of cayenne pepper.
How to Serve
Serve crispy bacon alongside scrambled eggs, pancakes, waffles, biscuits, or breakfast potatoes.
It is also excellent crumbled over baked potatoes, salads, soups, macaroni and cheese, and casseroles.
Use whole strips for BLT sandwiches, breakfast sandwiches, cheeseburgers, or wraps.
Meal Prep & Storage
Allow leftover bacon to cool completely before storing.
Place it in an airtight container in the refrigerator for up to 4–5 days.
Reheat briefly in a skillet, oven, or microwave until warm and crisp.
Cooked bacon can also be frozen. Separate portions with parchment paper and store them in a freezer-safe container for convenient future meals.
Common Mistakes to Avoid
Do not overcrowd the baking sheet with heavily overlapping bacon.
Avoid using a completely flat baking sheet because rendered grease can spill over the sides.
Do not walk away during the final minutes of cooking. Bacon browns quickly once it approaches the crispy stage.
Remember that it continues to crisp slightly after leaving the oven.
FAQ
What temperature is best for oven bacon?
400°F (205°C) provides a good balance between fast cooking and even rendering.
Do I need to flip the bacon?
Usually not. Oven heat cooks both sides effectively.
Can I cook thick-cut bacon this way?
Yes. Simply allow additional cooking time.
How do I make bacon extremely crispy?
Cook it a little longer and drain it thoroughly on paper towels. Using a wire rack can also help.
Can I cook an entire package at once?
Yes, provided the strips fit in a single layer. For a larger quantity, use two rimmed baking sheets.
Final Thoughts
Crispy Oven-Baked Bacon is simple, dependable, and ideal for preparing a generous batch at once. With minimal preparation and no constant stovetop flipping, you get beautifully browned strips ready for breakfast, sandwiches, casseroles, or any recipe that could use a smoky, crispy finishing touch.