Introduction
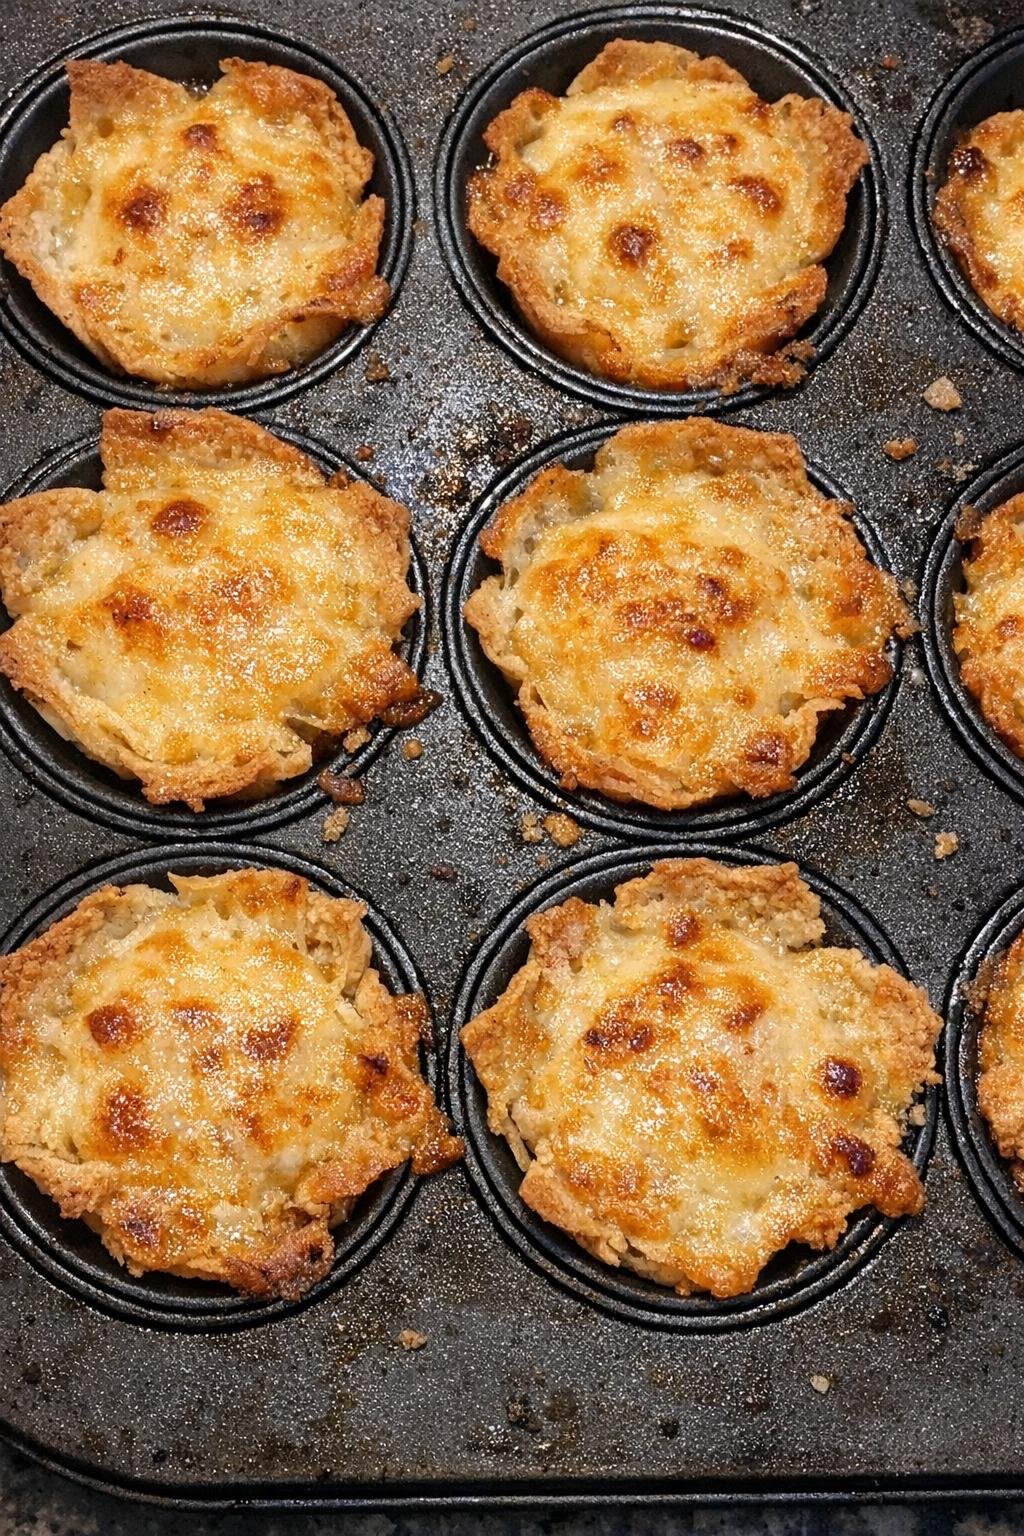
These Crispy Cheesy Chicken Muffin Cups are an easy baked appetizer or family dinner made with a crunchy seasoned crust, a creamy chicken filling, and a generous layer of melted golden cheese on top.
The muffin pan makes them perfect for individual portions. Each cup bakes with crisp edges while the center stays warm, cheesy, and savory. They are great for parties, game day, lunchboxes, potlucks, or a quick weeknight meal.
Why This Recipe Is Popular
These chicken muffin cups are simple to prepare and easy to serve. Instead of slicing a casserole, everyone gets their own crispy little portion.
The combination of chicken, cream cheese, mozzarella, and Parmesan gives the filling a rich texture, while the crust around the edges becomes crunchy and golden.
You can also prepare the filling ahead and assemble the cups just before baking.
Recipe Information
Prep Time: 20 minutes
Bake Time: 20–25 minutes
Total Time: About 45 minutes
Servings: 12 muffin cups
Difficulty: Easy
Cooking Method: Oven-Baked
Main Ingredients
Cooked chicken: Shredded rotisserie chicken is a convenient option.
Cream cheese: Makes the filling creamy and helps everything hold together.
Mozzarella: Melts beautifully over the tops.
Parmesan: Adds a salty, nutty flavor and helps create a golden crust.
Breadcrumbs or crushed crackers: Form the crispy outer layer.
Eggs: Help bind the crust and filling.
Ingredients
For the Crispy Crust:
2 cups finely crushed buttery crackers or seasoned breadcrumbs
½ cup grated Parmesan cheese
5 tablespoons melted butter
1 large egg
For the Chicken Filling:
2 cups cooked shredded chicken
8 ounces cream cheese, softened
½ cup sour cream
1 cup shredded mozzarella cheese
½ cup shredded cheddar cheese
2 garlic cloves, minced
1 teaspoon garlic powder
1 teaspoon onion powder
½ teaspoon paprika
½ teaspoon dried parsley
½ teaspoon salt
¼ teaspoon black pepper
For the Topping:
1 cup shredded mozzarella cheese
¼ cup grated Parmesan cheese
2 tablespoons melted butter, optional
Prepare the Muffin Pan
Preheat the oven to 375°F (190°C).
Generously grease a standard 12-cup muffin pan with cooking spray or softened butter.
This step is important because the cheese and crispy crust can stick around the edges.
Prepare the Crispy Crust
Combine the crushed crackers or breadcrumbs with Parmesan cheese.
Add the melted butter and egg.
Mix until the crumbs are evenly coated and hold together when pressed.
Divide the mixture among the muffin cups.
Press the crumbs firmly into the bottom and slightly up the sides of each cup.
This creates the crunchy shell seen around the edges.
Prepare the Chicken Filling
In a large bowl, combine the softened cream cheese and sour cream.
Mix until smooth.
Add the shredded chicken, mozzarella, cheddar, garlic, garlic powder, onion powder, paprika, parsley, salt, and black pepper.
Stir until everything is evenly coated.
The filling should be thick rather than runny.
Step-by-Step Instructions
Spoon the chicken filling into each prepared crust.
Press it gently into the muffin cups without packing it too tightly.
Sprinkle mozzarella generously over each cup.
Finish with Parmesan.
For extra browning, drizzle or brush a very small amount of melted butter over the cheese.
Bake at 375°F for 20–25 minutes.
The edges should be crispy and golden, and the cheese on top should be melted with browned spots.
For deeper color, broil for 1–2 minutes at the end, watching carefully.
Remove the pan from the oven.
Allow the cups to rest for about 5–10 minutes before removing them. This helps the crust firm up.
Run a thin knife gently around the edges if necessary, then lift each cup from the pan.
Tips for Best Results
Use finely crushed crackers or breadcrumbs so the crust packs together well.
Grease the muffin pan thoroughly.
Do not make the chicken filling too wet.
Use softened cream cheese so the filling mixes smoothly.
Let the cups cool briefly before removing them from the pan.
For the crispiest edges, bake until the outer crust is noticeably golden.
Flavor Variations
For Buffalo Chicken Muffin Cups, add buffalo sauce to the filling and serve with ranch.
For Bacon Ranch Chicken Cups, add cooked bacon and ranch seasoning.
For Broccoli Chicken Cups, fold finely chopped cooked broccoli into the filling.
For Spicy Chicken Cups, add jalapeños or crushed red pepper.
For Garlic Parmesan Chicken Cups, increase the garlic and Parmesan.
How to Serve
Serve these chicken muffin cups warm.
They pair well with ranch dressing, garlic sauce, honey mustard, or marinara.
For dinner, serve them with a green salad, roasted vegetables, soup, or mashed potatoes.
For parties, arrange them on a platter with dipping sauces in the center.
Meal Prep and Storage
Store leftovers in an airtight container in the refrigerator for up to 3 days.
For the best texture, reheat them in a 350°F (175°C) oven or air fryer until hot and crisp.
The microwave works, but the crust will become softer.
The chicken filling can be prepared one day ahead and refrigerated until ready to assemble.
Common Mistakes to Avoid
Do not skip greasing the muffin pan.
Avoid adding too much liquid to the chicken filling.
Do not remove the cups immediately after baking because the crust is more fragile while very hot.
Avoid overfilling the muffin wells.
Do not broil unattended because the cheese can burn quickly.
Frequently Asked Questions
Can I use rotisserie chicken?
Yes. Rotisserie chicken is one of the easiest choices.
Can I use breadcrumbs instead of crackers?
Yes. Seasoned breadcrumbs or panko both work.
Can I use cheddar instead of mozzarella?
Yes. A combination of cheddar and mozzarella gives good flavor and melt.
Can I make these ahead?
Yes. Prepare the filling ahead, then assemble and bake when ready.
Can I freeze them?
Yes. Cool completely, wrap well, and freeze. Reheat in the oven for the best texture.
Final Thoughts
These Crispy Cheesy Chicken Muffin Cups combine a crunchy golden crust with creamy chicken and bubbling melted cheese in an easy individual serving.
They are simple enough for a weeknight meal but also work beautifully as party food. Bake them until the edges are crisp and the cheese is deeply golden, then let them rest briefly before serving.