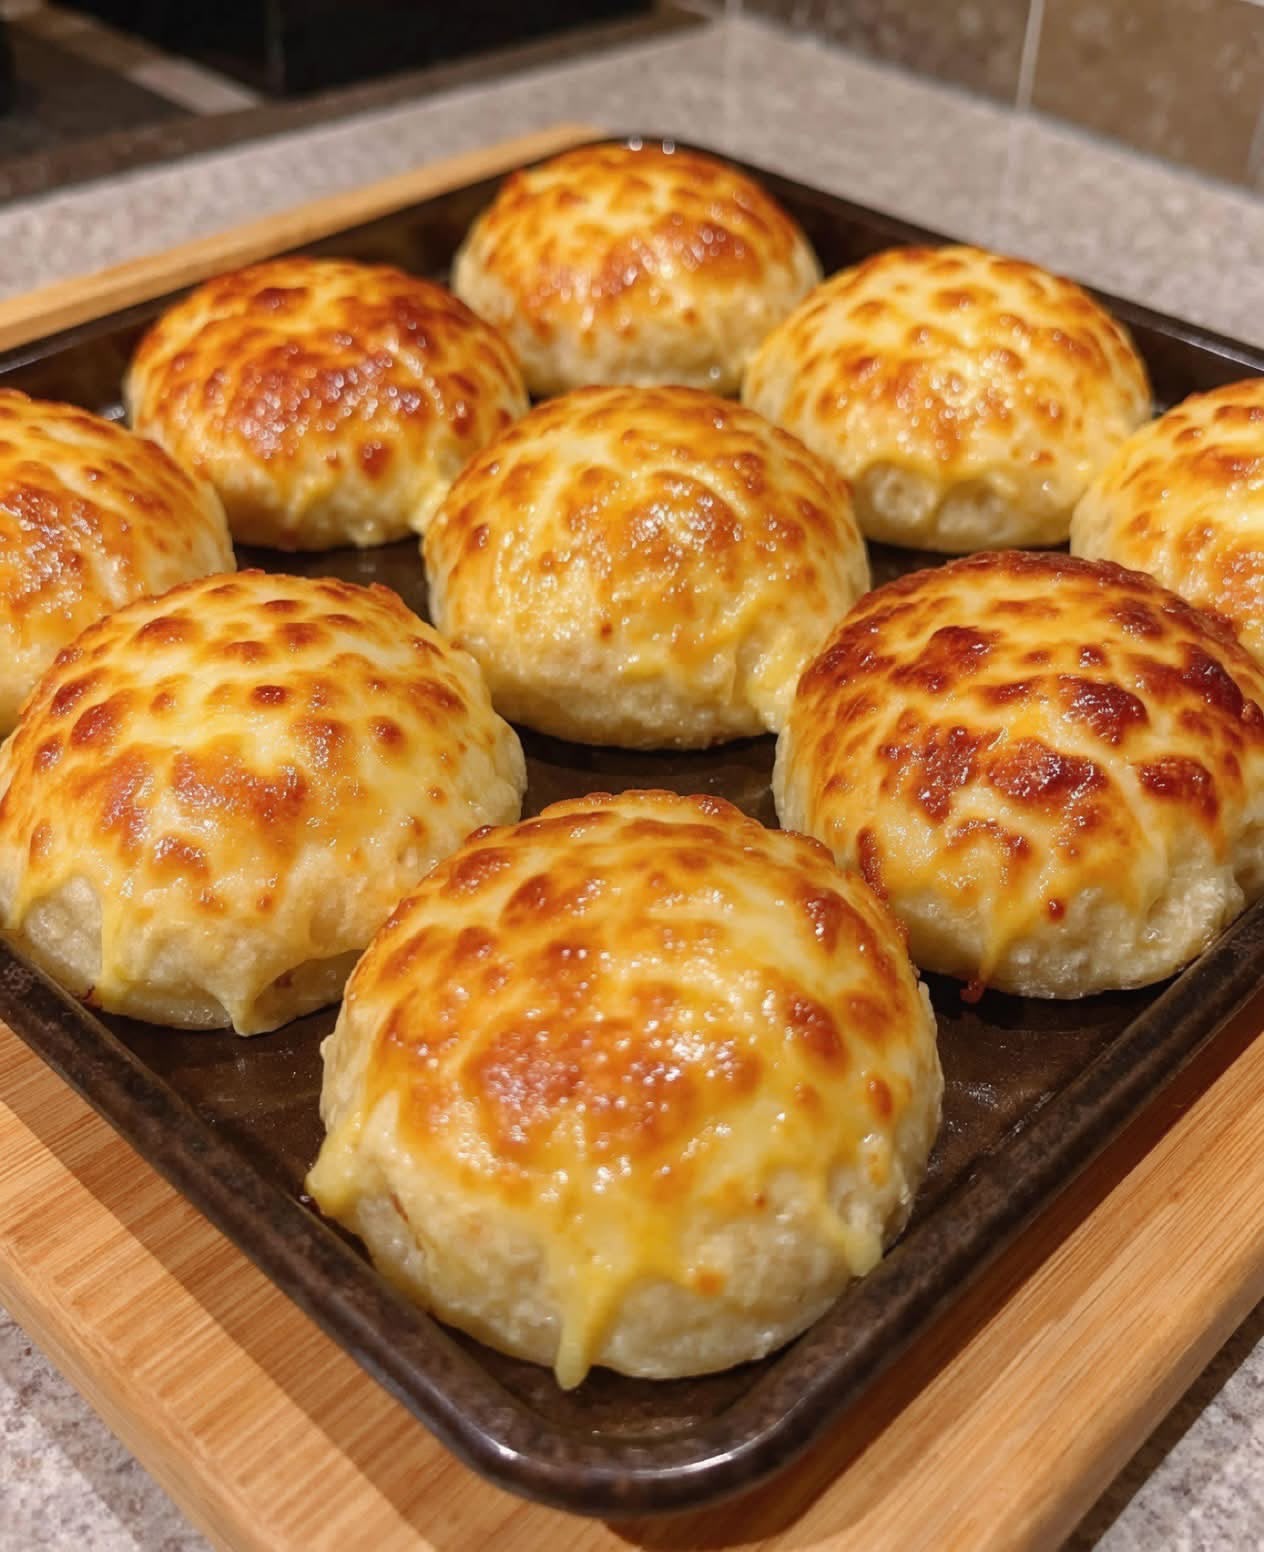
Cheesy stuffed garlic bread rolls are soft, golden rolls filled with melted cheese and finished with a delicious cheesy garlic topping. They are warm, fluffy, and full of comforting flavor, with a crisp golden surface and a creamy center that makes every bite satisfying.
These homemade cheese rolls are perfect for family dinners, soup nights, pasta meals, parties, or serving as a savory snack. They look impressive on a baking tray, but the recipe is simple enough for beginners. Serve them warm while the cheese is melted for the best texture and flavor.
Why You’ll Love This Recipe
These cheese-stuffed rolls are soft on the inside, lightly crisp on the outside, and full of rich cheese flavor. The dough bakes into fluffy individual portions, making them easy to serve and share. The garlic butter and cheese topping gives them a homemade bakery-style finish.
This recipe is flexible and easy to adapt. You can use mozzarella, cheddar, Monterey Jack, provolone, or a blend of cheeses. Add herbs, chili flakes, or cooked vegetables to the filling if you want more flavor. They work as a side dish, appetizer, or simple comfort-food snack.
Recipe Information
Preparation time for cheesy stuffed garlic bread rolls is about 25 minutes. Rising time is approximately one hour. Baking time is around 18 to 22 minutes. The total time is about one hour and 45 minutes. This recipe makes 10 to 12 rolls and serves six people. The difficulty level is easy to moderate.
Main Ingredients Explained
All-purpose flour creates a soft and tender dough that is easy to shape. Bread flour can also be used if you prefer a slightly chewier texture. Active dry yeast helps the dough rise and gives the rolls their light, fluffy structure.
Mozzarella is one of the best cheeses for the filling because it melts smoothly and creates a creamy, stretchy center. Cheddar adds a stronger flavor, while Parmesan on top adds a savory golden finish. Combining two or three cheeses gives the rolls extra richness.
Butter, garlic, and parsley create a simple topping that makes the rolls taste like cheesy garlic bread. The butter keeps the surface moist, the garlic adds warmth, and the herbs provide fresh color and flavor.
Simple Recipe Overview
Begin by mixing a soft yeast dough and letting it rise until puffy. Divide the dough into small pieces, place cheese in the center of each piece, and shape them into smooth balls. Arrange the rolls in a baking dish or on a tray.
Brush the rolls with garlic butter, sprinkle cheese over the top, and bake until golden. The finished rolls are fluffy, cheesy, and perfect for pulling apart while warm.
Ingredients
For the dough, you will need 3 cups all-purpose flour, 2¼ teaspoons active dry yeast, 1 tablespoon granulated sugar, 1 teaspoon salt, ¾ cup warm milk, ¼ cup warm water, 3 tablespoons melted butter, and 1 large egg. For the filling, you will need 1½ cups shredded mozzarella cheese or 10 to 12 small mozzarella cubes. For the topping, you will need 3 tablespoons melted butter, 2 cloves garlic finely minced, 1 tablespoon chopped parsley, ½ cup shredded mozzarella cheese, ¼ cup grated Parmesan cheese, and a small pinch of salt.
How to Choose the Best Ingredients
Choose fresh yeast that has not passed its expiration date. Yeast is important because it helps the dough rise properly. If the yeast does not become foamy when mixed with warm liquid and sugar, it may not be active and should be replaced.
Use milk that is warm but not hot. Milk that is too hot can affect the yeast, while cold milk slows the rising process. The liquid should feel pleasantly warm when touched, not uncomfortable.
Choose cheese that melts well. Low-moisture mozzarella is ideal for stuffed bread rolls because it melts without releasing too much liquid. Fresh mozzarella can be used, but dry it well before adding it to the dough.
Preparing the Dough
In a large bowl, combine the warm milk, warm water, sugar, and active dry yeast. Stir gently and let the mixture sit for five to 10 minutes. It should become foamy on top, showing that the yeast is active.
Add the melted butter and egg to the yeast mixture. Stir until combined. Add the flour and salt gradually, mixing until a soft dough forms. The dough should feel slightly tacky but not overly sticky.
Transfer the dough to a lightly floured surface and knead for about eight minutes. Push the dough away with the heel of your hand, fold it back over itself, and repeat. The dough should become smooth, elastic, and soft.
Place the dough in a lightly oiled bowl. Cover it with a clean towel or plastic wrap and let it rise in a warm place for about one hour, or until it doubles in size.
Preparing the Cheese Filling and Topping
While the dough rises, prepare the cheese filling. If using shredded mozzarella, divide it into small portions so it is easy to place inside each roll. If using cheese cubes, keep them ready on a small plate.
For the garlic butter topping, mix melted butter, minced garlic, chopped parsley, and a pinch of salt in a small bowl. Set it aside. Combine the shredded mozzarella and Parmesan in another bowl for the topping.
Keeping the filling and topping ready before shaping the dough makes the final steps faster and easier.
Step-by-Step Instructions
Once the dough has doubled in size, gently press it down to remove excess air. Transfer it to a lightly floured surface and divide it into 10 to 12 equal pieces. Roll each piece into a small ball.
Flatten one dough ball into a small round shape with your fingers. Place a portion of mozzarella cheese in the center. Pull the edges of the dough up around the cheese, pinch them closed, and roll the dough gently between your hands to make a smooth ball.
Place each filled dough ball seam-side down in a greased baking dish or on a parchment-lined baking tray. Leave a small amount of space between the rolls so they have room to expand as they rise and bake.
Cover the shaped rolls loosely and let them rest for 20 minutes. This second short rise helps create a softer, fluffier texture. While the rolls rest, preheat your oven to 375°F, or 190°C.
Brush the tops of the rolls with about half of the garlic butter mixture. Sprinkle the mozzarella and Parmesan cheese topping evenly over the rolls. Bake for 18 to 22 minutes, until the rolls are puffed, golden brown, and the cheese topping is melted with lightly browned spots.
Remove the tray from the oven and brush the warm rolls with the remaining garlic butter. Let them cool for five minutes before serving. The cheese inside will be hot, so the short cooling time makes them easier to enjoy.
Tips for the Best Result
Do not add too much cheese inside each roll. A moderate amount gives you a creamy center without causing the cheese to leak excessively during baking. If using shredded cheese, keep it compact in the center before sealing the dough.
Pinch the dough seams closed tightly. This helps keep the cheese inside while the rolls rise and bake. Always place the sealed side down on the baking sheet so the weight of the roll helps keep it closed.
For extra softness, cover the baked rolls loosely with a clean kitchen towel for five minutes after taking them out of the oven. The gentle trapped steam keeps the bread tender while the cheese topping stays warm.
Common Mistakes to Avoid
Avoid using milk or water that is too hot. Hot liquid can stop the yeast from working, which prevents the dough from rising. Keep the liquid warm and comfortable to the touch.
Do not add too much flour while kneading. The dough should be soft and slightly tacky. Adding excessive flour can make the finished rolls dense and dry.
Avoid overbaking the rolls. Take them out once they are golden and the cheese is melted. Baking too long can make the bread firm and cause the cheese filling to dry out.
Flavor Variations
For spicy cheese rolls, add crushed red pepper flakes, diced jalapeños, or a little hot sauce to the cheese filling. Pepper Jack cheese is also a great choice for a warm, spicy center.
For pizza-style rolls, add a small spoonful of thick marinara sauce, mozzarella, and finely chopped cooked vegetables or turkey pepperoni inside each dough ball. Serve with extra warm marinara for dipping.
For herb cheese rolls, mix dried oregano, basil, rosemary, or Italian seasoning into the dough or garlic butter. These herbs add a fragrant flavor that pairs beautifully with cheese and pasta dishes.
For cheddar garlic rolls, replace part of the mozzarella with sharp cheddar cheese. The cheddar gives the filling a stronger, more savory taste and creates a delicious golden top.
How to Serve Cheesy Stuffed Garlic Bread Rolls
Serve the rolls warm beside pasta, soup, chili, roasted chicken, salads, or baked casseroles. They are especially good with tomato-based pasta dishes because the soft cheesy bread is perfect for enjoying extra sauce.
For a party platter, serve the rolls with marinara sauce, ranch dressing, garlic aioli, or a creamy herb dip. They can also be cut in half and served as smaller appetizer bites.
For breakfast or brunch, pair the rolls with scrambled eggs, fresh fruit, and a light salad. They are versatile enough to fit into many meals and always look inviting when served fresh from the oven.
Meal Prep and Storage
The dough can be prepared one day in advance. After the first rise, cover the dough tightly and refrigerate it overnight. Let it sit at room temperature for about 30 minutes before shaping the rolls the next day.
Store baked leftovers in an airtight container at room temperature for up to one day or in the refrigerator for up to three days. The rolls are best fresh, but they can be reheated easily to soften the bread and melt the cheese again.
Freezing Instructions
You can freeze the shaped, unbaked rolls before the second rise. Arrange them on a tray, freeze until firm, then transfer them to a freezer-safe container. Freeze for up to one month.
To bake frozen rolls, place them in a greased baking dish, cover loosely, and let them thaw and rise in the refrigerator overnight or at room temperature until puffy. Add the garlic butter and cheese topping before baking.
You can also freeze fully baked rolls after they have cooled. Wrap them individually or store them in a container with parchment paper between layers.
Reheating Instructions
Reheat cheesy stuffed garlic bread rolls in a 325°F oven for six to eight minutes. Cover them loosely with foil to keep the bread soft, then uncover for the final minute if you want the cheese topping to become lightly crisp.
An air fryer can reheat one or two rolls quickly. Heat them at 300°F for three to four minutes. Avoid heating them too long, as the cheese filling can become very hot.
Frequently Asked Questions
Can I use store-bought pizza dough? Yes. Store-bought pizza dough is a convenient shortcut for this recipe. Let it sit at room temperature for a few minutes so it becomes easy to shape, then fill and bake the rolls as directed.
Can I make these rolls without garlic? Yes. Leave out the garlic and use plain melted butter or herb butter instead. The rolls will still be soft, cheesy, and delicious.
Why did my cheese leak out? The dough may not have been sealed tightly, or the rolls may have contained too much cheese. Use a moderate amount of filling and pinch the dough seams closed before placing them seam-side down.
Can I use cheddar instead of mozzarella? Yes. Cheddar works well, though it may release a little more oil as it melts. Combining cheddar with mozzarella creates a creamy filling with a stronger cheese flavor.
Can I make the rolls smaller? Yes. Divide the dough into smaller pieces to make appetizer-sized cheese rolls. Reduce the baking time slightly and check them once they are golden brown.
Final Thoughts
Cheesy stuffed garlic bread rolls are a warm, comforting recipe with soft homemade dough, melted cheese, and a golden garlic butter topping. They are easy enough for everyday meals but special enough to serve for guests, parties, and family gatherings.
Make them with mozzarella, cheddar, herbs, or your favorite filling, then serve them fresh from the oven while the cheese is warm and creamy. These fluffy cheese rolls are a simple way to make any meal feel more homemade and satisfying.