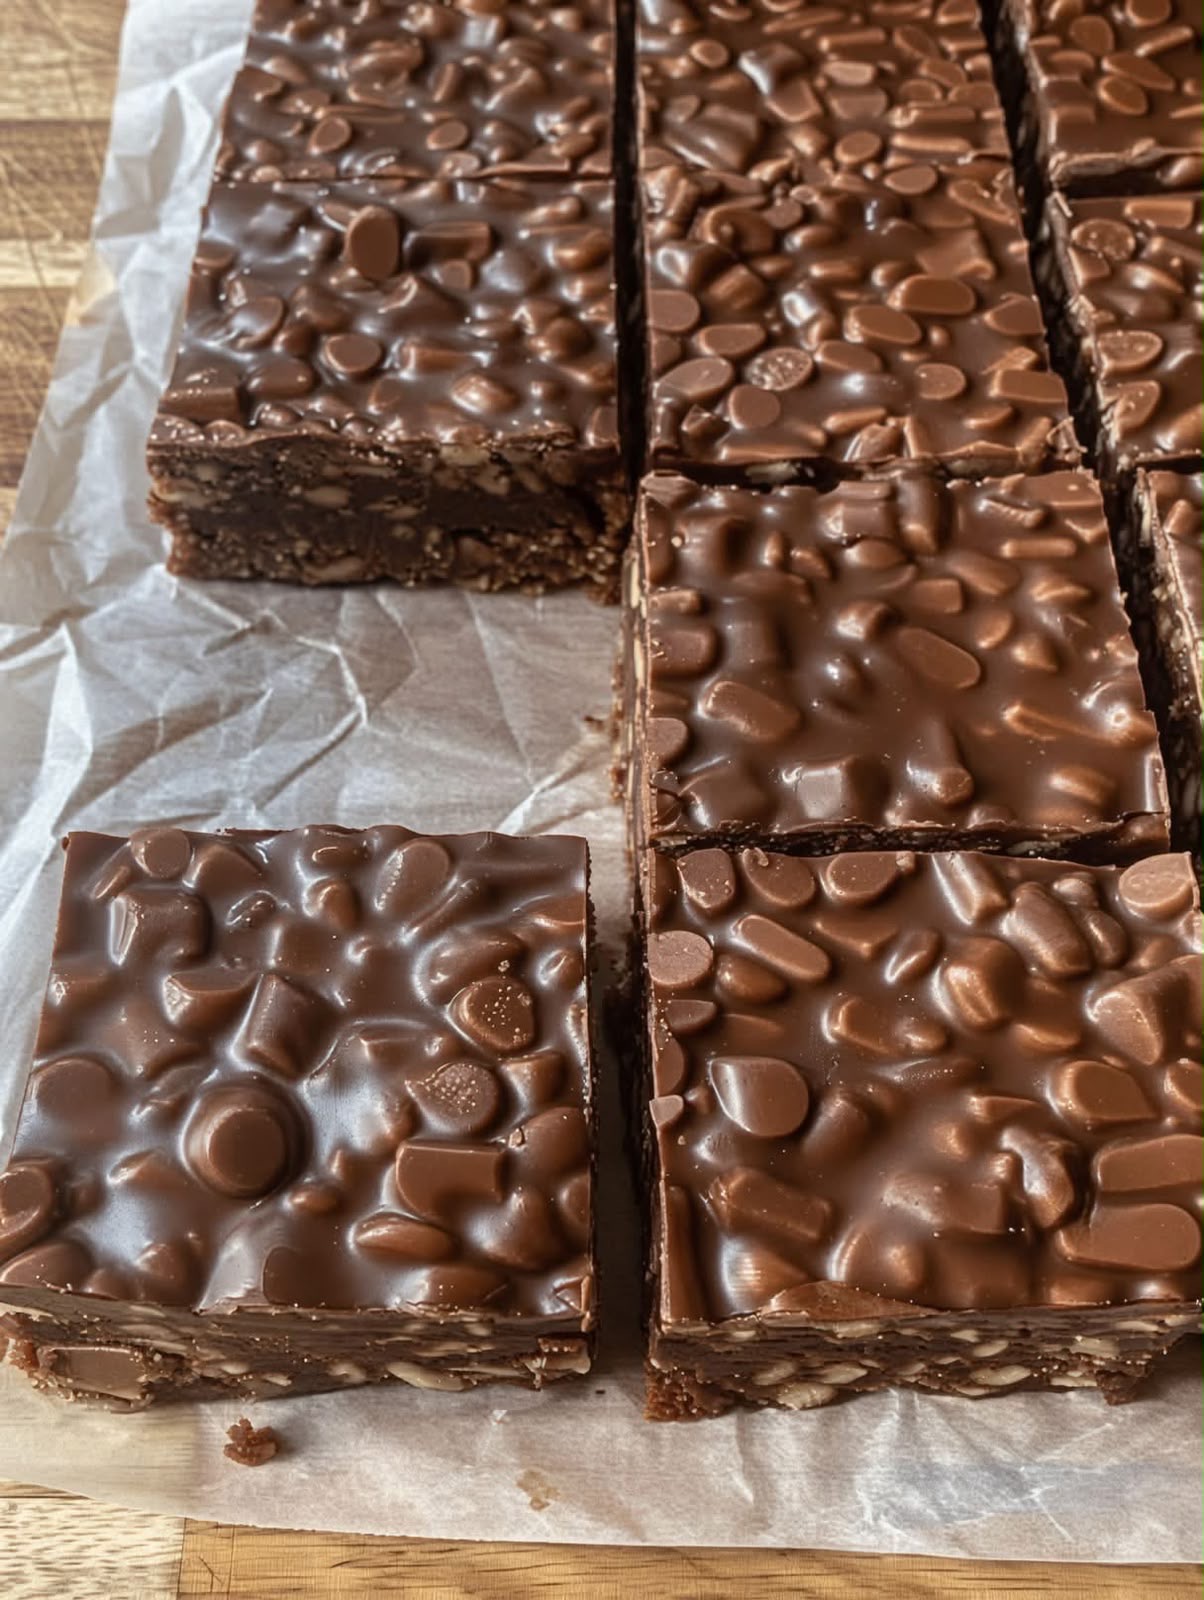
No-Bake Chocolate Crunch Bars
Introduction
Some homemade desserts prove that you do not need an oven, complicated techniques or hours in the kitchen to make something wonderfully indulgent. These No-Bake Chocolate Crunch Bars are a perfect example. Rich, smooth chocolate surrounds crisp rice cereal and chopped nuts, while creamy peanut butter adds a deliciously mellow flavour that makes every bite satisfying.
What makes these bars particularly appealing is their combination of textures. The chocolate mixture becomes firm enough to slice after chilling, yet remains pleasantly smooth when you bite into it. Meanwhile, the crispy rice cereal creates a delicate crunch, and the chopped peanuts or mixed nuts add a heartier, nutty contrast.
The recipe begins with a simple mixture of milk chocolate chips, semi-sweet chocolate chips, peanut butter and butter. Once melted together, these ingredients form a glossy chocolate coating that binds the cereal and nuts without requiring flour, eggs or baking.
Because these chocolate crunch bars are prepared in a single square pan, they are especially convenient for sharing. Cut them into generous squares for a family dessert, smaller pieces for a party platter or neat little bites to serve alongside an afternoon cup of coffee.
Another advantage is that most of the work happens in just a few minutes. Once the mixture has been stirred together and pressed into the pan, the refrigerator takes care of the setting process. There is no oven to preheat, no cake to monitor and no complicated icing to prepare.
Whether you are looking for an easy weekend sweet, a chocolate peanut butter treat or a make-ahead dessert for a gathering, these homemade crunch bars offer plenty of chocolate flavour with very little effort.
Recipe Overview
- Recipe Name: No-Bake Chocolate Crunch Bars
- Category: Dessert, Sweet Treats, Chocolate Bars
- Style: Homemade no-bake dessert
- Preparation Time: Approximately 15 minutes
- Cooking Time: No baking required
- Chilling Time: Approximately 2 hours
- Total Time: Approximately 2 hours 15 minutes
- Yield: Approximately 16 squares, depending on size
- Difficulty: Easy
- Cooking Method: Microwave melting and refrigeration
- Pan Size: 8×8-inch or 9×9-inch square pan
- Main Ingredients: Chocolate chips, peanut butter, crispy rice cereal and nuts
The preparation and chilling times are straightforward estimates based on the original method. A 9×9-inch pan produces slightly thinner bars than an 8×8-inch pan, but either works well for this recipe.
Why You’ll Love This Recipe
- No oven required: The bars firm up in the refrigerator, making them convenient when you want a dessert without baking.
- Wonderful contrast of textures: Smooth chocolate, crispy rice cereal and chopped nuts create a satisfying combination.
- Rich chocolate flavour: Mixing milk and semi-sweet chocolate chips gives the bars sweetness with a more rounded chocolate taste.
- Easy preparation: Melting, stirring, spreading and chilling are the main tasks involved.
- Great for making ahead: You can prepare the bars before a gathering and keep them chilled until serving.
- Simple to portion: Cut the finished slab into large squares, small dessert bites or rectangular chocolate bars.
- Customisable: The basic method allows for optional changes to the nuts, chocolate or crunchy additions.
- Ideal for sharing: These bars are easy to pack into a covered container for family gatherings, dessert tables and casual celebrations.
Ingredients
These no-bake chocolate crunch bars use a straightforward combination of chocolate, peanut butter and crunchy ingredients. The quantities below are taken directly from the original recipe.
Chocolate Mixture
- 3 cups milk chocolate chips
- 1 cup semi-sweet chocolate chips
- 1 cup creamy peanut butter
- 2 tablespoons unsalted butter
- 1 teaspoon vanilla extract
- Pinch of salt
Crunchy Additions
- 2½ cups crispy rice cereal
- 1 cup chopped peanuts or mixed nuts
Chocolate Topping
- ½ cup mini chocolate chips, for topping
Important: Choose crispy rice cereal rather than uncooked rice. The cereal should already be light, crisp and ready to eat.
Ingredient Notes
Milk Chocolate Chips
Milk chocolate provides most of the sweetness and creamy texture in these bars. Its mellow flavour balances the roasted notes of the nuts and the richness of the peanut butter.
Choose chocolate chips you enjoy eating on their own. Since chocolate is the dominant ingredient, its flavour will have a noticeable effect on the finished dessert.
Semi-Sweet Chocolate Chips
Semi-sweet chocolate adds a deeper cocoa flavour and prevents the dessert from tasting quite as sweet as it would with milk chocolate alone. The combination creates a balanced, rich chocolate base.
Creamy Peanut Butter
Peanut butter contributes smoothness, nutty flavour and body to the chocolate mixture. Conventional creamy peanut butter generally blends easily because it has a consistent texture.
If using natural peanut butter, stir it thoroughly before measuring so the oil is evenly incorporated. A particularly runny variety may produce softer bars.
Unsalted Butter
Butter helps the melted chocolate mixture become smooth and easy to stir. Because the original recipe uses unsalted butter, the pinch of salt can be adjusted independently.
Vanilla Extract
Vanilla adds a gentle aromatic sweetness that complements both chocolate and peanut butter. Stirring it in after melting helps distribute its flavour throughout the mixture.
Crispy Rice Cereal
This ingredient produces the signature light crunch. It creates small pockets of crisp texture throughout the dense chocolate mixture without making the bars overly heavy.
Use fresh cereal that has been stored in an airtight container. Stale cereal can make the finished bars less satisfying.
Chopped Peanuts or Mixed Nuts
Chopped nuts give these chocolate bars a more substantial crunch and a delicious roasted flavour. Peanuts naturally complement the peanut butter, while mixed nuts can provide a combination of textures.
Chop larger nuts into small, fairly even pieces so they distribute throughout the mixture and are easier to slice.
Mini Chocolate Chips
The final sprinkling of mini chocolate chips adds an attractive textured surface and extra little bursts of chocolate. Press them gently into the warm mixture before chilling so they remain attached.
Salt
Even a small pinch of salt can make the chocolate flavour taste more rounded. The goal is not to make the bars salty but to balance their sweetness.
Equipment You’ll Need
- 8×8-inch or 9×9-inch square baking pan
- Parchment paper
- Large microwave-safe mixing bowl
- Microwave
- Heatproof spatula or sturdy spoon
- Measuring cups and spoons
- Knife for chopping nuts
- Sharp knife for slicing the bars
- Refrigerator
- Airtight container for storage
A flexible silicone spatula is particularly helpful because it allows you to scrape the sides of the bowl thoroughly and spread the thick chocolate mixture into the corners of the pan.
Step-by-Step Instructions
Step 1: Prepare the Pan
Line an 8×8-inch or 9×9-inch square pan with parchment paper, leaving a little overhang on two opposite sides. These extra parchment edges act as handles when lifting the set chocolate slab out of the pan.
Press the parchment gently into the corners so it sits as flat as possible. This makes the chocolate mixture easier to spread and helps the finished bars keep neat edges.
Step 2: Combine the Chocolate Ingredients
Place 3 cups of milk chocolate chips, 1 cup of semi-sweet chocolate chips, 1 cup of creamy peanut butter and 2 tablespoons of unsalted butter into a large microwave-safe bowl.
Choose a bowl with enough space for stirring and for adding the cereal and nuts later. This reduces the need to transfer the melted chocolate between bowls.
Step 3: Melt the Chocolate Mixture
Microwave the ingredients in 30-second intervals, stirring thoroughly after each interval, until everything has melted into a smooth, glossy mixture.
Chocolate can retain its shape even when it is becoming soft, so stirring is essential. As the mixture approaches a fully melted consistency, use shorter bursts if necessary to avoid overheating.
Step 4: Add Vanilla and Salt
Stir 1 teaspoon of vanilla extract and a small pinch of salt into the melted chocolate mixture.
Mix until evenly incorporated. The chocolate should look smooth, with no visible streaks of peanut butter or unmelted chocolate.
Step 5: Fold in the Crunchy Ingredients
Add 2½ cups of crispy rice cereal and 1 cup of chopped peanuts or mixed nuts.
Using a spatula, fold everything together gently until the cereal and nuts are evenly coated with chocolate. Scrape the bottom of the bowl several times to ensure there are no dry pockets.
A folding motion works better than aggressive stirring because it helps preserve the cereal’s delicate crunch.
Step 6: Transfer the Mixture to the Pan
Spoon or pour the chocolate mixture into the prepared pan. Spread it into an even layer, making sure it reaches all four corners.
Gently level the surface with the back of a spatula. Apply enough pressure to remove obvious gaps, but avoid compacting the cereal excessively.
Step 7: Add the Chocolate Topping
Sprinkle ½ cup of mini chocolate chips evenly across the surface.
Gently press the chips into the chocolate mixture so they adhere without disappearing completely beneath the surface. This creates a chocolate-studded finish once the bars are set.
Step 8: Refrigerate Until Firm
Place the pan in the refrigerator for approximately 2 hours, or until the chocolate slab feels completely firm.
The exact setting time may vary depending on the pan size, the thickness of the mixture and the refrigerator temperature.
Step 9: Remove from the Pan
Once firm, grip the parchment overhang and carefully lift the entire chocolate slab out of the pan.
Transfer it to a chopping board and peel away any parchment sticking to the sides or bottom.
Step 10: Slice and Serve
Using a sharp knife, cut the slab into thick square bars. For approximately 16 pieces, divide the slab into four rows in each direction.
Serve the bars chilled for a firmer bite, or allow them to sit briefly at room temperature for a slightly softer chocolate texture.
They are now ready to enjoy as a rich, crunchy chocolate treat.
How to Melt Chocolate Smoothly
Melting chocolate is the most important technique in this recipe because the melted mixture holds everything together.
Use Gentle Heat
Chocolate is sensitive to overheating. Microwaving in short intervals allows the chocolate to soften gradually while giving you opportunities to stir and check its consistency.
The original recipe recommends 30-second intervals. Once most of the chocolate has melted, reduce the heating time if needed and continue stirring until smooth.
Stir Between Every Interval
Microwaves do not always heat chocolate evenly. Some areas may become considerably warmer than others.
Stirring redistributes the heat and encourages the remaining chips to melt without unnecessary additional heating.
Keep Water Away
Make sure the bowl and spatula are completely dry. Even a small amount of accidental water can cause melted chocolate to seize and develop a thick, grainy texture.
Look for a Glossy Finish
The finished chocolate mixture should be smooth enough to coat the cereal easily. If it still contains visible lumps, stir again before deciding whether it needs another short burst in the microwave.
How to Keep the Bars Crunchy
The best no-bake chocolate crunch bars have a firm chocolate coating surrounding cereal that remains pleasantly crisp. A few simple details help preserve this texture.
Use Fresh Cereal
Crispy rice cereal provides a light, airy crunch, but it can absorb moisture from the air. Open a fresh packet or use cereal that has been stored properly in a sealed container.
Allow the Chocolate to Cool Slightly
The chocolate should be melted and fluid when the cereal is added, but it does not need to be excessively hot. Giving the mixture a brief stir before folding in the cereal helps distribute the heat.
Fold Rather Than Beat
Vigorous mixing can break the cereal into fine crumbs. Fold with broad, gentle movements until every piece is coated.
Avoid Excessive Compression
Press the mixture only enough to create a cohesive slab. Flattening it too forcefully can crush the cereal and change the intended texture.
Keep Moisture Out During Storage
Once the bars are ready, store them in an airtight container. This protects their texture and reduces the chance of absorbing refrigerator odours or excess moisture.
How to Cut Perfect Chocolate Bars
These homemade bars are attractive when cut into thick, neat squares with their crunchy interiors visible along the edges.
Chill Completely
Cutting before the chocolate has set can make the pieces collapse or stick to the knife. Refrigerate until the entire slab is firm, including the centre.
Use a Sharp Knife
A large, sharp kitchen knife gives more control than a small blunt knife. Position the blade where you want to cut and press through steadily.
Warm the Blade if Necessary
If the bars are very hard, allow them to stand briefly at room temperature. You can also warm the knife under hot water, dry it completely and then slice.
Never use a wet blade directly against the chocolate.
Wipe Between Cuts
Chocolate residue can build up along the blade. Wiping it clean between slices helps maintain neat, attractive edges.
Choose Your Portion Size
For a rich dessert, cut the slab into 16 squares. For a party platter, smaller pieces may be preferable because these bars contain a generous amount of chocolate and peanut butter.
Expert Tips for the Best Chocolate Crunch Bars
- Line the pan carefully. Leave enough parchment hanging over the edges to lift the finished slab easily.
- Use good-quality chocolate. The chocolate is the main flavour, so choose chips with a taste and texture you enjoy.
- Measure before melting. Have the cereal, nuts and topping ready so the chocolate does not begin setting while you prepare other ingredients.
- Use creamy peanut butter. A smooth, well-stirred consistency helps create an even mixture.
- Stir the chocolate frequently. Do not wait for every chip to lose its shape before mixing.
- Avoid overheating. Overheated chocolate can become thick, grainy or scorched.
- Chop nuts evenly. Smaller pieces distribute more consistently and make cutting easier.
- Fold the cereal gently. Preserve the crisp texture instead of breaking the cereal into crumbs.
- Spread into the corners. An even layer creates more consistent portions.
- Add topping before chilling. The mini chocolate chips adhere better while the chocolate surface is still soft.
- Allow enough chilling time. Do not assume the bars are ready simply because the surface feels cool.
- Keep the bars covered. Chocolate can absorb unwanted refrigerator odours when left uncovered for extended periods.
- Use a dry, sharp knife. This helps cut through the nuts and chocolate with less breakage.
- Consider the serving temperature. Chilled bars offer a firmer snap, while slightly warmer bars have a softer bite.
Common Mistakes to Avoid
1. Melting Chocolate for Too Long
Heating chocolate continuously can cause scorching. Use the recommended short microwave intervals and stir thoroughly between them.
2. Using a Damp Bowl
Accidental water can make melted chocolate seize. Dry all utensils before starting.
3. Using Stale Crispy Rice Cereal
Old cereal can lose its crispness. Fresh cereal makes a noticeable difference to the finished texture.
4. Adding Too Many Extra Ingredients
It may be tempting to add additional cereal, biscuits or nuts, but excessive dry ingredients can leave too little chocolate to hold the bars together.
5. Stirring Too Aggressively
Overmixing can crush the rice cereal. Fold gently to maintain a distinctive crunchy bite.
6. Forgetting the Parchment Paper
Without parchment, removing a firm chocolate slab from a pan can be difficult. The overhang also makes transferring much easier.
7. Cutting Before Fully Set
Soft chocolate can stick to the knife and produce uneven squares. Wait until the centre is firm.
8. Using Unevenly Chopped Nuts
Very large pieces may create awkward cutting points. Chop the nuts into reasonably similar sizes.
9. Leaving Bars in a Warm Room
Chocolate softens in warm conditions. Keep the bars chilled until serving, particularly during warmer weather.
Optional Recipe Variations
The following suggestions are optional alternatives to the original recipe. They are not required ingredients.
1. Dark Chocolate Crunch Bars
Replace some or all of the milk chocolate with dark chocolate for a less sweet, more intense cocoa flavour. The resulting texture may be slightly firmer depending on the chocolate used.
2. Extra Peanut Crunch
Use chopped roasted peanuts rather than mixed nuts to emphasise the classic chocolate and peanut butter combination.
3. Almond Chocolate Bars
Substitute chopped almonds for the peanuts or mixed nuts. Almonds provide a slightly different roasted flavour and a firm, satisfying crunch.
4. Pretzel Chocolate Crunch
Replace a portion of the crispy rice cereal with roughly broken pretzels. This creates a sweet-and-salty variation with larger crunchy pieces.
5. Chocolate Coconut Bars
Replace some of the chopped nuts with desiccated coconut for a light coconut flavour. Keep the overall quantity of dry additions similar.
6. Sunflower Butter Variation
For a peanut-free adaptation, use a suitable sunflower seed butter and omit the peanuts, replacing them with another compatible crunchy ingredient. Always check chocolate, cereal and other packaging for allergen information and cross-contact warnings.
7. White Chocolate Drizzle
For an optional decorative finish, drizzle a little separately melted white chocolate over the completely chilled bars. This changes the original topping but creates a contrasting appearance.
Serving Suggestions
Because these chocolate crunch bars are rich and sweet, they work especially well with simple drinks or lighter accompaniments.
With Coffee
Serve a square alongside freshly brewed coffee or espresso. The bitterness of coffee balances the sweet milk chocolate and nutty peanut butter.
With Cold Milk
A glass of chilled milk is a classic accompaniment to chocolate desserts and makes these bars an appealing family treat.
On a Dessert Platter
Arrange smaller squares alongside fresh strawberries, raspberries or other fruit. Their natural acidity offers a refreshing contrast to the rich chocolate.
With Vanilla Ice Cream
Serve one small chocolate crunch bar beside a scoop of vanilla ice cream for a simple plated dessert.
For Parties and Gatherings
Cut the bars into bite-sized squares and arrange them on a lined serving tray. Keep them cool before serving so they retain their shape.
As an Afternoon Treat
A small square pairs nicely with tea or hot chocolate when you want something sweet without preparing a fresh dessert.
Storage and Make-Ahead Tips
Refrigerator Storage
Store the finished bars in an airtight container in the refrigerator. For best quality, aim to enjoy them within approximately one week, provided the ingredients were fresh and the bars were handled hygienically.
If stacking multiple layers, place parchment paper between them to prevent sticking.
Room Temperature
The bars can be served at room temperature for a softer texture, but they should not be left in a hot environment. Chocolate and peanut butter can soften noticeably as temperatures rise.
For reliable storage, particularly in warm weather, refrigeration is preferable.
Freezing
These bars can also be frozen. Wrap individual pieces securely or arrange them in a freezer-safe container with parchment between layers.
For best flavour and texture, use within approximately two months. Thaw in the refrigerator to reduce condensation and preserve the crunchy consistency.
Do They Need Reheating?
No reheating is necessary. These are no-bake chocolate bars designed to be eaten chilled or slightly softened at room temperature.
Making Them Ahead
Prepare the chocolate mixture, spread it into the pan and refrigerate until firm. You can make the bars the day before an event, then cut and arrange them shortly before serving.
Keep the finished pieces in a covered container and use clean utensils when handling them.
Frequently Asked Questions
1. What are no-bake chocolate crunch bars?
They are chilled chocolate squares made by combining melted chocolate with crunchy ingredients such as crispy rice cereal and nuts. The mixture firms up in the refrigerator rather than in an oven.
2. Do I need to bake these chocolate bars?
No. The original recipe uses a microwave to melt the chocolate ingredients, followed by refrigeration to set the bars.
3. How long do the bars need to chill?
Approximately 2 hours, or until completely firm. Thicker bars may require a little longer.
4. Can I use only milk chocolate?
Yes, as an optional variation, although the bars will generally taste sweeter without the semi-sweet chocolate.
5. Can I use dark chocolate instead?
Yes. Dark chocolate creates a stronger cocoa flavour and may produce a slightly firmer texture.
6. Is crunchy peanut butter suitable?
It can be used as a variation, but creamy peanut butter is recommended in the original recipe because it blends smoothly and gives the chocolate mixture an even consistency.
7. Can I leave out the nuts?
Yes, but the texture will change. You can experiment with additional crispy cereal or another suitable crunchy ingredient to replace the omitted nuts.
8. Can I use natural peanut butter?
Yes, although the results may vary. Stir it thoroughly before measuring, and choose a variety that is not excessively oily or runny.
9. Why are my bars too soft?
They may need more chilling time, or the peanut butter may have a particularly loose consistency. Warm room temperatures can also soften chocolate-based bars.
10. Why are my bars difficult to cut?
Very cold chocolate can become quite firm. Let the slab rest briefly at room temperature and use a sharp knife.
11. Why did my chocolate become grainy?
Overheating or accidental contact with water can cause chocolate to become thick or grainy. Use a dry bowl and melt in short intervals.
12. Can I use a saucepan instead of a microwave?
Yes. As an alternative technique, use gentle indirect heat over a bain-marie, keeping the bowl clear of the water. Stir until the ingredients melt smoothly.
13. What kind of rice cereal works best?
Plain crispy rice cereal works well because it has a light texture and does not overpower the chocolate flavour.
14. Can I use a larger pan?
Yes, but the bars will be thinner. A larger pan can also make the chocolate slab set more quickly.
15. Can I use a smaller pan?
A smaller pan creates thicker bars, which may need extra chilling time before slicing.
16. Can I freeze chocolate crunch bars?
Yes. Wrap them well and place them in an airtight freezer-safe container. Thaw in the refrigerator before serving.
17. How long will they keep in the refrigerator?
For best quality, consume within approximately one week when stored properly in an airtight container.
18. Are these bars gluten-free?
Not automatically. Some crispy rice cereals contain barley malt or other gluten-containing ingredients. Check every ingredient label and use certified gluten-free products if required.
19. Are these bars suitable for people with nut allergies?
The original recipe contains peanut butter and peanuts or mixed nuts, so it is not suitable for people allergic to those ingredients. Any allergy-friendly adaptation requires carefully selected substitutes and checks for cross-contact.
20. Can children help make these bars?
Children can help measure cereal, sprinkle the topping and gently stir cooled ingredients under adult supervision. An adult should handle the hot melted chocolate and sharp knife.
21. Can I make these bars without butter?
The original recipe includes butter. Omitting it is an optional modification that may alter the way the chocolate melts and sets.
22. Why do the mini chocolate chips fall off?
They may not have been pressed into the surface firmly enough before the mixture set. Add them while the chocolate is still soft.
23. Can I package these bars as homemade gifts?
Yes, provided you keep them appropriately chilled and package them hygienically. Include accurate information about the peanut, tree nut, milk and any other relevant allergens.
24. How can I make the bars look more professional?
Chill thoroughly, lift the slab onto a clean chopping board and use a sharp, dry knife. Cut into evenly sized squares and clean the blade between cuts.
25. What makes these bars so crunchy?
The combination of crispy rice cereal and chopped nuts creates two complementary textures: a delicate cereal crispness and a firmer nutty crunch.
Complete Recipe Card
No-Bake Chocolate Crunch Bars
Description: Rich, creamy chocolate peanut butter bars packed with crispy rice cereal and chopped nuts, finished with mini chocolate chips and chilled until firm.
- Category: Dessert
- Method: No-bake, microwave and refrigerator
- Preparation Time: Approximately 15 minutes
- Chilling Time: Approximately 2 hours
- Total Time: Approximately 2 hours 15 minutes
- Yield: Approximately 16 squares
- Difficulty: Easy
Ingredients
- 3 cups milk chocolate chips
- 1 cup semi-sweet chocolate chips
- 1 cup creamy peanut butter
- 2 tablespoons unsalted butter
- 1 teaspoon vanilla extract
- 2½ cups crispy rice cereal
- 1 cup chopped peanuts or mixed nuts
- ½ cup mini chocolate chips, for topping
- Pinch of salt
Instructions
- Line an 8×8-inch or 9×9-inch square pan with parchment paper, leaving some overhang for easy removal.
- Combine the milk chocolate chips, semi-sweet chocolate chips, creamy peanut butter and unsalted butter in a large microwave-safe bowl.
- Microwave in 30-second intervals, stirring after each interval, until the chocolate mixture is completely melted and smooth.
- Stir in the vanilla extract and a pinch of salt until evenly combined.
- Add the crispy rice cereal and chopped peanuts or mixed nuts. Fold gently until everything is thoroughly coated in chocolate.
- Transfer the mixture to the lined pan and spread it into an even layer.
- Sprinkle the mini chocolate chips over the surface and press them gently into the chocolate.
- Refrigerate for approximately 2 hours, or until completely firm.
- Lift the set chocolate slab out of the pan using the parchment paper.
- Cut into thick square bars and serve chilled or at room temperature.
Recipe Notes
- Use fresh crispy rice cereal for the best texture.
- Melt chocolate gradually and stir frequently to prevent overheating.
- An 8×8-inch pan creates thicker bars than a 9×9-inch pan.
- Let very firm bars rest briefly before cutting to reduce cracking.
- Store in an airtight container in the refrigerator for best quality.
- These bars contain peanuts and may contain tree nuts, milk, soya and gluten depending on the ingredients used.
Relevant Hashtags
#NoBakeDesserts #ChocolateCrunchBars #ChocolatePeanutButter #EasyDessertRecipes #HomemadeChocolateTreats
Share Your Chocolate Crunch Bars
These No-Bake Chocolate Crunch Bars are a lovely reminder that simple ingredients can create a memorable homemade dessert. With their creamy chocolate coating, peanut butter flavour and crispy nut-filled centre, they are equally enjoyable as a family treat or a sweet addition to a party table.
If you try this recipe, share how your bars turned out in the comments. Did you use chopped peanuts or mixed nuts? Did you serve them straight from the refrigerator or allow them to soften slightly first?
Save this recipe for your next chocolate craving, share it with someone who loves easy no-bake desserts and follow along for more homemade sweets, family favourites and simple kitchen inspiration.