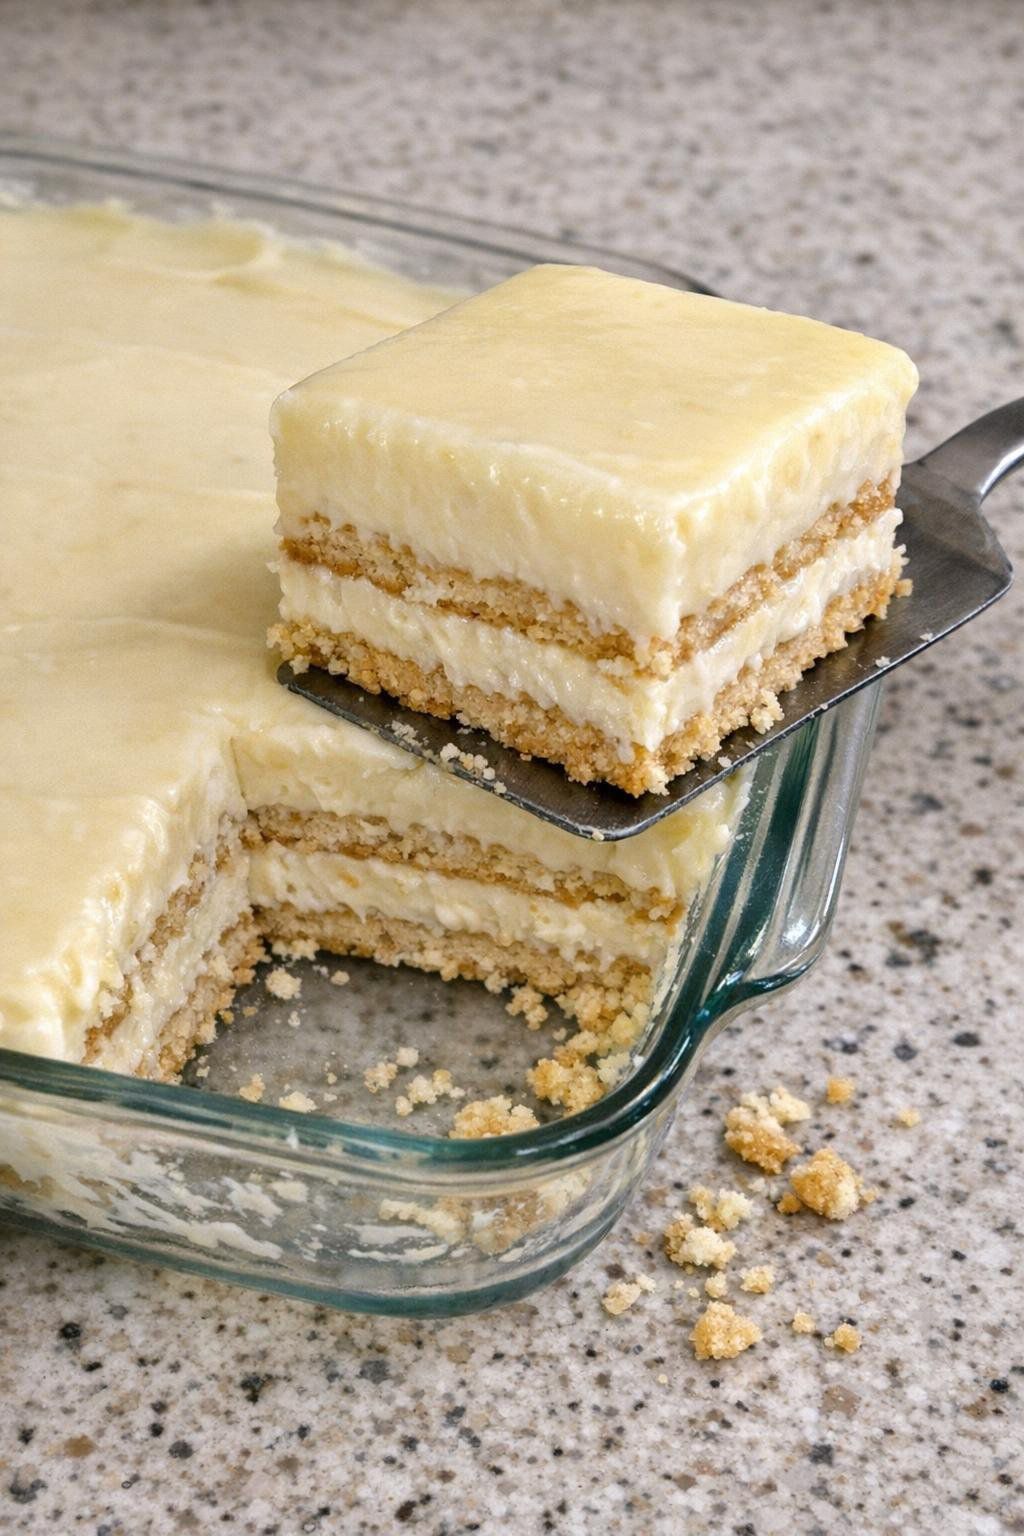
This No-Bake Vanilla Cream Layered Dessert is the perfect combination of buttery cookie layers and a thick, silky vanilla cream filling. Every square has soft, creamy layers with just enough cookie texture to create a dessert that feels rich and indulgent without requiring complicated baking.
It is an excellent choice for family gatherings, holidays, potlucks, summer parties, or an easy make-ahead dessert. Prepare it in advance, let it chill in the refrigerator, and slice it into beautiful creamy squares when you’re ready to serve.
Why You’ll Love This No-Bake Dessert
The biggest advantage is simplicity. You don’t need to prepare cake batter or spend time watching the oven.
The cookie layers gradually soften as the dessert chills, absorbing some moisture from the vanilla filling. After several hours, everything comes together into a soft, cake-like texture.
It is also a great make-ahead recipe. In fact, this dessert tastes better after several hours in the refrigerator because the layers have enough time to set.
Ingredients
For the cookie layers:
- 3 cups vanilla wafer or graham cracker crumbs
- ½ cup unsalted butter, melted
- 2 tablespoons granulated sugar
For the creamy vanilla filling:
- 16 ounces (450 g) cream cheese, softened
- 1 cup powdered sugar
- 2 teaspoons vanilla extract
- 2 cups heavy whipping cream, cold
For the vanilla pudding layer:
- 2 packages instant vanilla pudding mix, about 3.4 ounces each
- 3 cups cold whole milk
For the creamy topping:
- 1½ cups whipped topping or freshly whipped cream
- 1 teaspoon vanilla extract
Prepare the Cookie Base
Place the cookie crumbs in a mixing bowl.
Add the melted butter and granulated sugar.
Stir until all the crumbs are evenly coated. The mixture should resemble wet sand and hold together when pressed between your fingers.
Reserve approximately one-third of the crumb mixture for the middle layer.
Press the remaining crumbs firmly into the bottom of a 9×13-inch baking dish.
Use the bottom of a measuring cup or drinking glass to create an even, compact layer.
Place the dish in the refrigerator while preparing the filling.
Make the Cream Cheese Filling
Place the softened cream cheese in a large mixing bowl.
Beat until completely smooth and creamy.
Add the powdered sugar and vanilla extract and continue beating until combined.
In another bowl, whip the cold heavy cream until stiff peaks form.
Gently fold the whipped cream into the cream cheese mixture.
Don’t stir aggressively. Folding helps maintain the light, fluffy texture.
The finished mixture should be thick enough to spread but still soft and creamy.
Prepare the Vanilla Pudding
Pour the cold milk into a separate mixing bowl.
Add the instant vanilla pudding mix.
Whisk according to the package directions until the pudding becomes thick.
Allow it to stand for approximately 5 minutes.
For an especially creamy filling, gently fold about half of the prepared pudding into the cream cheese mixture.
Keep the remaining pudding for the upper layer.
Assemble the First Cream Layer
Remove the chilled crust from the refrigerator.
Spread approximately half of the cream cheese mixture over the cookie base.
Use a spatula to spread it gently from edge to edge.
Take your time so you don’t disturb the crumb crust underneath.
Add the Middle Cookie Layer
Sprinkle the reserved cookie crumbs evenly over the cream layer.
Press them down very lightly.
You don’t want this layer to become completely compact. It should remain slightly loose so that it absorbs moisture from the cream and becomes tender while chilling.
This middle cookie layer creates the beautiful striped appearance when the dessert is sliced.
Add Another Creamy Layer
Spread the remaining cream cheese filling carefully over the cookie crumbs.
Smooth the surface.
Then spread the remaining vanilla pudding over the top.
This creates multiple layers of cookie crumbs, cream cheese filling, and silky vanilla pudding.
Finish With the Creamy Topping
Combine the whipped topping with vanilla extract.
Spread it evenly across the entire dessert.
Use a spatula to create a smooth surface.
For an elegant finish, you can sprinkle a small amount of finely crushed vanilla wafers over the top immediately before serving.
Chill Until Completely Set
This step is extremely important.
Cover the baking dish and refrigerate for at least 6 hours.
For the best texture, refrigerate it overnight.
During this resting period, the creamy filling firms up while the cookie layers absorb a small amount of moisture and soften.
The result is a dessert that can be sliced into neat squares while remaining luxuriously creamy.
How to Get Beautiful Clean Slices
Use a sharp knife.
Dip the knife into hot water and wipe it completely dry before making each cut.
Repeat between slices.
A clean, slightly warm blade moves through the chilled cream layers more easily and prevents excessive filling from sticking to the knife.
Use a thin dessert spatula to lift each square from the baking dish.
Easy Shortcut Version
If you’re short on time, several ingredients can be simplified.
Use store-bought whipped topping instead of whipping heavy cream.
Use instant vanilla pudding for the entire vanilla component.
And instead of crushing cookies yourself, purchase graham cracker crumbs.
The dessert will still have beautiful layers while requiring very little active preparation.
Make It With Graham Crackers
Instead of vanilla wafers, use graham crackers.
Crush them finely for the bottom crust.
For the middle layer, you can either use crumbs or arrange whole graham cracker sheets over the cream.
Whole crackers gradually soften during refrigeration and develop an almost cake-like consistency.
Banana Cream Variation
Add thinly sliced bananas between the vanilla cream and cookie layers.
Banana and vanilla work beautifully together.
However, bananas gradually brown and release moisture, so this variation is best served relatively soon after preparation.
Lemon Cream Variation
Replace vanilla pudding with lemon pudding.
Add approximately one teaspoon of fresh lemon zest to the cream cheese mixture.
The slight acidity cuts through the richness and creates a refreshing dessert that’s particularly good during spring and summer.
Coconut Cream Variation
Use coconut-flavored pudding instead of vanilla.
Fold approximately ½ cup toasted coconut into the filling or sprinkle it over the finished dessert.
Vanilla, cream cheese, and coconut make an excellent combination.
Chocolate Variation
Chocolate lovers can easily transform the recipe.
Replace the vanilla pudding with chocolate pudding and use chocolate cookie crumbs for one or both cookie layers.
You could also drizzle melted chocolate over the chilled top immediately before serving.
What to Serve With This Dessert
This creamy dessert is rich enough to serve on its own.
For a fresh contrast, add strawberries, raspberries, blueberries, or sliced peaches.
A small spoonful of berry sauce also pairs beautifully with the vanilla filling.
For coffee lovers, serve each chilled square alongside hot coffee or espresso.
Perfect for Potlucks
One reason layered desserts are so popular at gatherings is that they’re easy to prepare in one large dish.
You don’t need to assemble individual portions.
Simply refrigerate the entire pan, transport it chilled, and slice it when you’re ready to serve.
A 9×13-inch pan generally provides around 12–16 servings, depending on how large you cut the squares.
Make-Ahead Instructions
This dessert is ideal for preparing the day before serving.
Assemble everything, cover the baking dish tightly, and refrigerate overnight.
The extended chilling time actually improves the texture.
If you’re adding fresh fruit or crunchy decorations, wait until shortly before serving so they remain fresh.
Common Mistakes to Avoid
Using warm cream cheese: Softened is good, but it shouldn’t be melted.
Using warm whipping cream: Heavy cream whips best when cold.
Not chilling long enough: The dessert may collapse when sliced if the filling hasn’t completely set.
Adding too much milk to the pudding: Follow the quantities carefully so the filling remains thick.
Pressing the middle crumbs too firmly: The center cookie layer should remain tender.
Trying to slice while warm: This dessert should be thoroughly chilled before cutting.
How to Store It
Cover the baking dish tightly or transfer individual portions to airtight containers.
Keep the dessert refrigerated and use within approximately 3–4 days for best quality.
Because it contains dairy-based ingredients, don’t leave it sitting at room temperature for extended periods.
Return leftovers to the refrigerator promptly.
Frequently Asked Questions
Does this dessert need to be baked?
No. It is designed as a refrigerated no-bake dessert.
How long should it chill?
At least 6 hours, although overnight is preferable.
Can I use graham crackers instead of vanilla wafers?
Yes. Either works very well.
Can I prepare it the night before?
Absolutely. Preparing it one day ahead is actually one of the best options.
Why is my filling too soft?
The pudding may contain too much milk, the cream may not have been whipped sufficiently, or the dessert may simply need additional refrigeration.
Can I add fresh fruit?
Yes. Strawberries, blueberries, raspberries, bananas, and peaches all pair nicely with vanilla cream.
Final Thoughts
This No-Bake Vanilla Cream Layered Dessert is proof that an impressive dessert doesn’t have to involve complicated baking.
A buttery cookie base, layers of fluffy vanilla cream, silky pudding, and another tender cookie layer come together to create beautiful chilled squares that practically melt in your mouth.
Prepare it the night before, give those layers plenty of time to soften and set, then serve it straight from the refrigerator. It’s creamy, simple, make-ahead friendly, and perfect when you need a crowd-pleasing dessert without turning on the oven. 🍰🤍✨