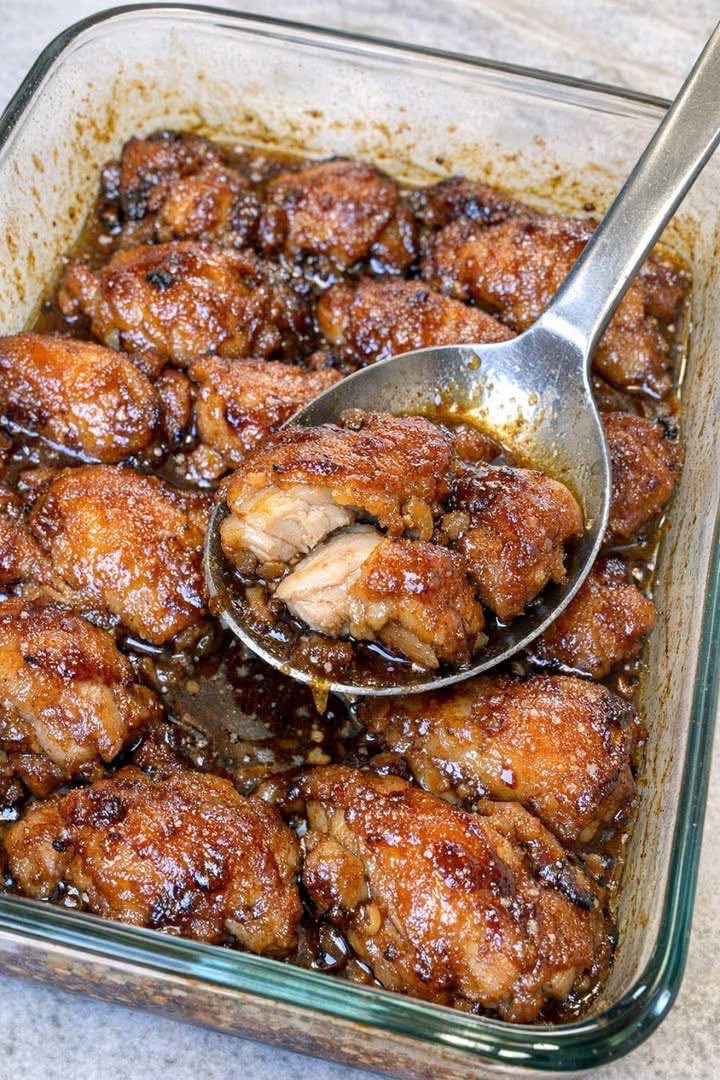
Golden, lacquered, and swimming in a glossy pan sauce you will want to spoon over everything — these baked chicken thighs turn six pantry ingredients into a dinner that tastes like it took all day. The oven does the work while the sugar, soy, and garlic reduce into a sticky glaze that clings to every piece of crispy skin.
Table of Contents
• Why You Will Love This Recipe
• Recipe Overview
• Ingredients You Will Need
• Why Chicken Thighs Are the Right Cut Here
• The Science Behind a Sticky Glaze
• How to Make Sticky Brown Sugar Garlic Chicken Thighs
• Tips for the Best Results
• Variations to Try
• What to Serve With Sticky Chicken Thighs
• Make-Ahead and Storage
• Frequently Asked Questions
• Nutrition Information
• Final Thoughts
[AD PLACEMENT 1 — after the table of contents]
Why You Will Love This Recipe
This is the kind of recipe that earns a permanent spot on your weeknight rotation after one try. Everything happens in a single baking dish, which means no searing in batches and no extra pan to scrub.
The glaze is the star. Brown sugar melts into soy sauce and garlic, then reduces in the oven’s heat until it thickens into something between a marinade and a caramel sauce.
Chicken thighs are also forgiving in a way chicken breasts never are. You can leave them in the oven an extra five minutes and they stay juicy instead of turning into cardboard.
It is a budget dinner that does not taste like one. Bone-in thighs are one of the cheapest cuts at the butcher counter, and the ingredient list is short enough to keep in your pantry year-round.
Recipe Overview
Prep time: 10 minutes
Cook time: 45 minutes
Total time: 55 minutes
Servings: 6
Course: Main dish
Cuisine: American, Asian-inspired
Difficulty: Easy
Equipment: 9×13-inch baking dish or 8×8 glass dish, mixing bowl, whisk, tongs, spoon for basting
[AD PLACEMENT 2 — after the recipe overview]
Ingredients You Will Need
• 8 bone-in, skin-on chicken thighs (about 3 pounds)
• 1/2 cup packed dark brown sugar
• 1/3 cup low-sodium soy sauce
• 8 garlic cloves, finely minced
• 1 medium yellow onion, finely diced
• 2 tablespoons rice vinegar or apple cider vinegar
• 1 tablespoon olive oil
• 1 teaspoon smoked paprika
• 1/2 teaspoon black pepper
• 1/2 teaspoon kosher salt
• 1/2 teaspoon crushed red pepper flakes (optional)
A few notes on the important ones. Dark brown sugar has more molasses than light brown sugar, and that molasses is what gives the finished glaze its deep mahogany color and slight bitterness that keeps the dish from tasting like dessert.
Use low-sodium soy sauce if you have it. Regular soy sauce works, but you should then cut the added kosher salt entirely, because the glaze concentrates as it reduces and salt has nowhere to go.
Fresh garlic is non-negotiable here. Jarred minced garlic turns muddy and slightly sour when it cooks for 45 minutes, while fresh cloves soften into sweet little flecks that stick to the chicken.
Why Chicken Thighs Are the Right Cut Here
Chicken thighs contain significantly more intramuscular fat and connective tissue than breast meat, and both of those matter enormously in a long, glaze-based bake. As the thighs cook, the collagen slowly converts to gelatin, which keeps the meat moist and gives the pan sauce a silky body that a breast could never produce.
The bone matters just as much as the fat. Bone-in thighs cook more evenly because the bone moderates heat transfer to the center of the meat, and the marrow contributes flavor to the sauce pooling underneath.
Skin-on is what separates a good version of this dish from a great one. The skin renders its fat into the glaze during the first half of baking, and by the end it has crisped and caramelized into the best bite on the plate.
If you only have boneless, skinless thighs, the recipe still works but requires adjustment. Reduce the total bake time to roughly 30 minutes and add two tablespoons of butter to the sauce to compensate for the missing rendered fat.
[AD PLACEMENT 3 — after the cut explanation]
The Science Behind a Sticky Glaze
The lacquered finish on these thighs comes from two separate chemical reactions happening at once. The Maillard reaction browns the proteins on the chicken’s surface starting around 300°F, producing hundreds of new aroma compounds, while the brown sugar simultaneously begins to caramelize.
Caramelization needs concentration to work. That is why the glaze starts thin and watery and only becomes sticky in the last 15 minutes, once enough moisture has evaporated for the sugar to reach a syrup stage.
Acid is the ingredient most home cooks skip, and it is the one that makes the glaze taste balanced. The vinegar cuts through the sugar and soy, and it also slightly inhibits the sugar from crystallizing as it cools in the dish.
Understanding this explains the most common failure. If you cover the dish with foil for the entire bake, steam has no escape route, the liquid never reduces, and you end up with poached chicken sitting in sweet broth instead of a glaze.
How to Make Sticky Brown Sugar Garlic Chicken Thighs
Step 1: Preheat and prepare the dish
Preheat your oven to 375°F and lightly oil a 9×13-inch baking dish. Glass or ceramic works better than metal here, because it holds heat steadily and lets you see how the sauce is reducing.
Step 2: Dry and season the chicken
Pat every thigh completely dry with paper towels, then season both sides with the salt, black pepper, and smoked paprika. Dry skin is the single biggest factor in whether your chicken crisps or steams.
Step 3: Make the glaze
Whisk together the brown sugar, soy sauce, minced garlic, diced onion, vinegar, olive oil, and red pepper flakes in a bowl until the sugar dissolves. The mixture will look thin and unpromising at this stage, which is exactly right.
Step 4: Assemble
Arrange the thighs skin side up in a single layer in the baking dish, leaving a little space between each one. Pour the glaze around the chicken rather than directly over the skin, so the tops stay dry enough to brown.
Step 5: Bake uncovered
Slide the dish into the oven and bake uncovered for 30 minutes. The sauce will bubble aggressively around the edges and begin to darken as the onion softens into it.
Step 6: Baste and finish
Spoon the pan sauce over the thighs, then return the dish to the oven for another 15 to 20 minutes. Baste once more near the end, when the sauce has thickened enough to coat the back of a spoon.
Step 7: Check and rest
The chicken is done when a thermometer inserted near the bone reads 175°F to 180°F. Let the dish rest for 10 minutes so the glaze tightens and the juices redistribute before serving.
[AD PLACEMENT 4 — after the instructions]
Tips for the Best Results
Never skip drying the chicken. Even a minute with paper towels changes the texture of the finished skin dramatically, because surface moisture must evaporate before browning can begin.
Resist the urge to crowd the pan. Thighs packed shoulder to shoulder release steam onto each other and the skin turns rubbery, so use a larger dish or two smaller ones if needed.
Dice the onion finer than feels necessary. Large chunks stay crunchy and sit awkwardly in the sauce, while a fine dice melts into the glaze and thickens it naturally.
Watch the last ten minutes closely. Sugar goes from perfectly caramelized to burnt faster than you expect, and every oven runs slightly differently.
Broil for two minutes if the skin looks pale. Position the rack in the upper third, keep the oven door cracked, and do not walk away for even a moment.
Save every drop of pan sauce. Tilt the dish and spoon the reduced glaze into a small bowl to pass at the table, because it is genuinely the best part.
Variations to Try
For a honey garlic version, swap half the brown sugar for honey and add a teaspoon of grated fresh ginger. The result is floral and slightly thinner, so bake an extra five minutes.
A Filipino-inspired adobo take works beautifully with this method. Increase the vinegar to 1/3 cup, add three bay leaves and a tablespoon of whole peppercorns, and cut the sugar to 1/4 cup.
For heat lovers, stir two tablespoons of gochujang or sriracha into the glaze before pouring. The chili paste also thickens the sauce, giving it more cling.
Drumsticks and wings work with no other changes beyond timing. Drumsticks need roughly the same 45 minutes, while wings finish in about 35.
[AD PLACEMENT 5 — after the variations]
What to Serve With Sticky Chicken Thighs
Steamed jasmine rice is the obvious and correct answer. It soaks up the glaze without competing with it, and the contrast of plain rice against intense sauce is the whole point.
Something green and sharp balances the plate. Try a cucumber salad with rice vinegar, blanched green beans with sesame, or a simple slaw dressed with lime.
Roasted broccoli or bok choy also works if you want everything from the oven. Roast on a separate sheet pan at the same temperature during the last 20 minutes of the chicken’s bake.
For a heartier meal, mashed potatoes or buttered egg noodles turn the pan sauce into gravy. It is not traditional in any sense, but it is undeniably delicious.
Make-Ahead and Storage
You can mix the glaze up to three days ahead and store it covered in the refrigerator. You can also marinate the raw thighs directly in it for up to 12 hours, which deepens the flavor noticeably.
Leftovers keep in an airtight container in the fridge for four days. Store the chicken submerged in its sauce so it does not dry out, and reheat covered at 325°F for about 15 minutes.
Freezing works well for up to three months. Freeze the cooked thighs with their sauce in a freezer bag laid flat, then thaw overnight in the refrigerator before reheating.
Avoid the microwave if you care about the skin. It reheats the meat fine but turns the crisped exterior soft and slightly chewy.
Frequently Asked Questions
Can I use boneless skinless chicken thighs?
Yes, but reduce the bake time to roughly 30 minutes and add two tablespoons of butter to the glaze. Check for an internal temperature of 165°F.
Why is my sauce watery?
The dish was likely covered, or the thighs were crowded and released too much liquid. Pour the sauce into a saucepan and simmer it for five minutes to reduce, then spoon it back over.
Can I make this in a slow cooker?
You can, but you will not get crisp skin or true caramelization. Cook on low for five hours, then transfer the thighs to a sheet pan and broil for three minutes to finish.
Is this recipe very sweet?
It is balanced rather than sugary, because the soy sauce and vinegar counter the brown sugar. If you prefer it less sweet, reduce the sugar to 1/3 cup.
Can I double the recipe?
Yes, using two baking dishes rather than one larger crowded pan. Rotate the dishes halfway through baking for even browning.
What can I substitute for soy sauce?
Tamari works identically and keeps the dish gluten-free. Coconut aminos also work but are sweeter, so cut the brown sugar by two tablespoons.
[AD PLACEMENT 6 — after the FAQ]
Nutrition Information
Per serving, based on 6 servings:
• Calories: 462
• Protein: 34 g
• Carbohydrates: 21 g
• Fat: 26 g
• Saturated fat: 7 g
• Sugar: 18 g
• Sodium: 890 mg
• Fiber: 0.4 g
These values are estimates calculated from standard ingredient databases and will vary based on the exact size of your thighs and how much glaze you consume. Removing the skin before eating reduces the calories by roughly 70 per serving.
Final Thoughts
There is a specific category of recipe that looks impressive, costs almost nothing, and requires no real skill, and this one sits comfortably at the top of it. The whole thing rests on a handful of pantry staples doing something more interesting together than any of them could alone.