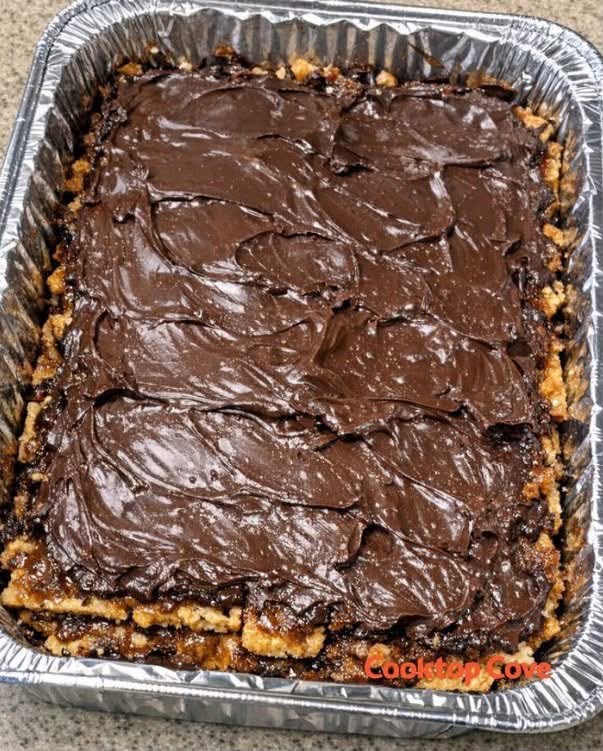
These chocolate oat bars look fancy but they’re almost too easy. You mix a buttery oat base, press it into a disposable foil pan, add a thick chocolate layer, and let it set. No fancy pan, almost no dishes, and they disappear at potlucks.
The foil pan is the whole point: bake or chill right in it, slice in it, and take it to the party. Cleanup is throw-the-pan-away.
Why You’ll Love These Chocolate Oat Bars
• Only 6 basic ingredients you probably already have
• Made in a disposable foil pan — almost zero cleanup
• Chewy oat base + thick chocolate top
• Perfect for potlucks, bake sales, and last-minute desserts
• Easy to cut into clean squares once chilled
• Store well in the fridge or freezer
Ingredients
For the oat base:
• 3 cups old-fashioned rolled oats
• 1 cup creamy peanut butter (or almond butter)
• ½ cup honey or maple syrup
• ¼ cup melted butter or coconut oil
• 1 teaspoon vanilla extract
• Pinch of salt
For the chocolate topping:
• 2 cups semi-sweet chocolate chips
• 2 tablespoons butter or coconut oil (for shine and easier spreading)
Optional additions:
• ½ cup chopped peanuts or walnuts
• Flaky sea salt on top
• Mini marshmallows mixed into the base
• A swirl of extra peanut butter on the chocolate
How to Make Chocolate Oat Bars
1. Lightly grease a 9×13-inch disposable foil pan (or line with parchment if you want to lift the whole slab out later).
2. In a large bowl, mix the oats, peanut butter, honey, melted butter, vanilla, and salt until everything is evenly coated and sticky.
3. Press the oat mixture firmly into the foil pan. Use the back of a spoon or a piece of parchment to pack it down so the bars hold together.
4. Melt the chocolate chips with the 2 tablespoons of butter in the microwave in 30-second bursts, stirring between each, until smooth and glossy.
5. Pour the melted chocolate over the oat base and spread it into an even layer. Make swirls with the spatula if you want that homemade look.
6. Let the pan sit at room temperature for 20–30 minutes, then refrigerate for at least 1–2 hours until the chocolate is firm.
7. Slice into squares right in the foil pan. Wipe the knife with a warm damp cloth between cuts for clean edges.
How to Serve
Serve chilled or at cool room temperature. The chocolate snaps a little when cold and gets fudgier as it sits out. These are great on a dessert table, packed in lunchboxes, or cut small for a snack board.
Variations
• Peanut-free: Use almond butter or sunflower seed butter.
• Extra chocolate: Stir ½ cup chocolate chips into the oat base before pressing.
• Salted caramel vibe: Drizzle a little caramel over the oat layer before the chocolate.
• Crunchy: Add crushed pretzels or Rice Krispies to the oat mix.
• Mint: Use mint chocolate chips for the topping.
Tips for Best Results
• Pack the oat layer firmly or the bars will crumble when you cut them.
• Don’t skip the small amount of butter/oil in the chocolate — it makes spreading easier and gives a nicer shine.
• If the chocolate seizes, add another teaspoon of oil and stir.
• For cleaner cuts, chill well and use a sharp knife warmed under hot water.
Make-Ahead, Store & Freeze
These bars are excellent make-ahead.
• Fridge: Keep covered in the foil pan for up to 1 week.
• Room temperature: Fine for 2–3 days if your kitchen isn’t hot.
• Freeze: Wrap the whole pan or individual squares tightly. Freeze up to 2 months. Thaw in the fridge.
FAQ
Can I use quick oats?
Yes, but the texture will be a bit softer and less chewy. Old-fashioned oats give the best bite.
Do I have to use a foil pan?
No. A regular 9×13 pan works. The foil pan is just for easy transport and cleanup.
Can I make these without peanut butter?
Yes. Swap in almond butter, cookie butter, or even extra melted butter + a little more honey (the bars will be slightly less sturdy).
Why is my chocolate topping cracking?
It was probably too cold when you cut it, or there wasn’t enough fat in the chocolate. Let it sit 10 minutes at room temperature before slicing, or add a bit more butter next time.
Can I double the recipe?
Yes. Use a larger foil roasting pan or two 9×13 pans.
Final Thoughts
This is the kind of dessert you make when you need something that looks homemade and tastes rich but doesn’t take over your afternoon. The foil pan does half the work. Mix, press, spread chocolate, chill, done.
Make a pan this weekend. You’ll be glad you did.