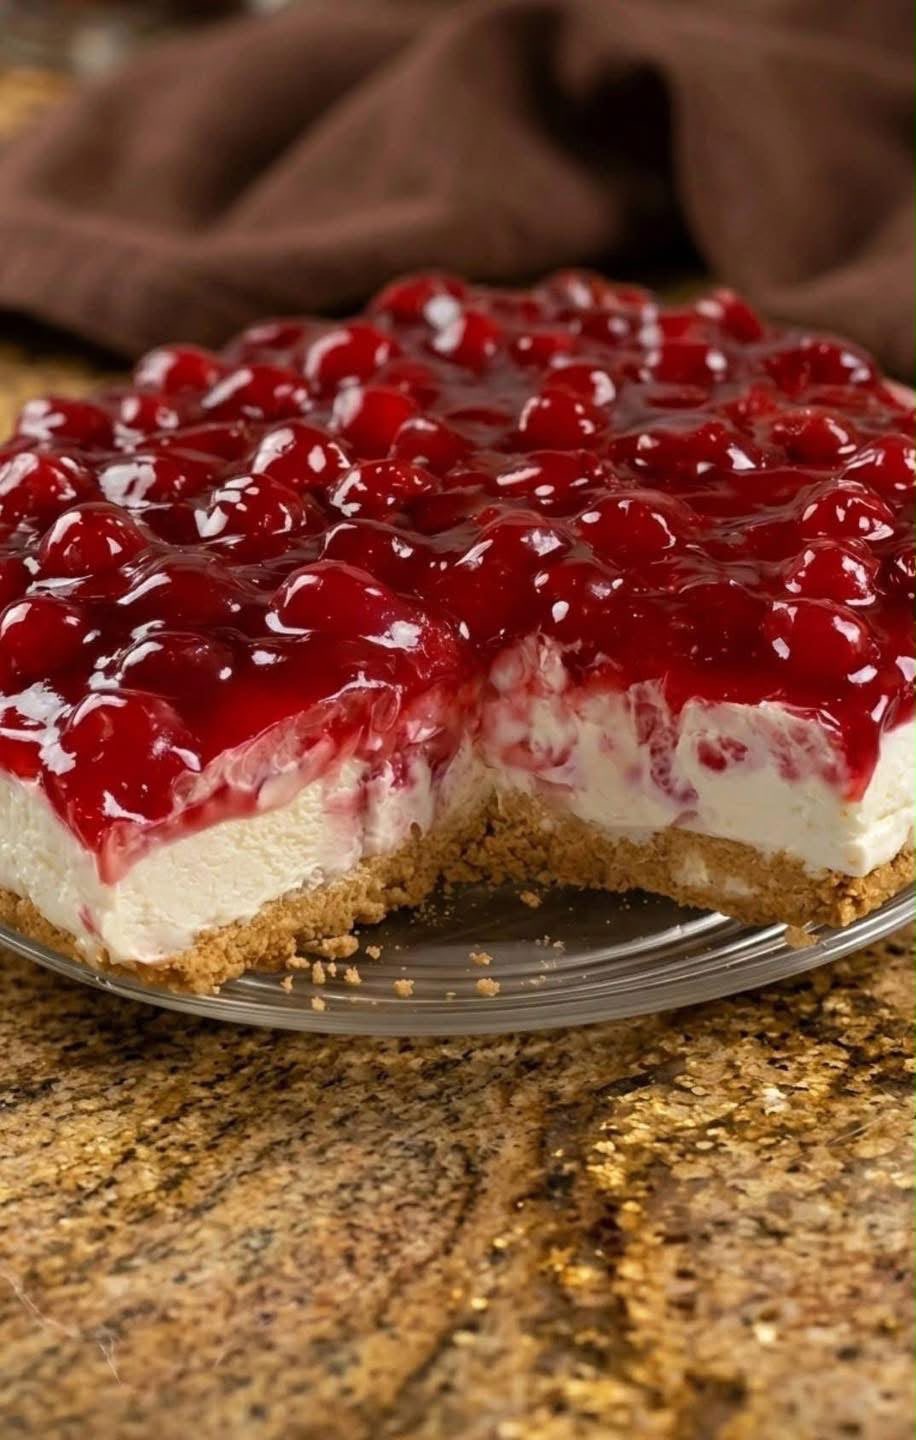
This Classic Cherry Cheesecake is a beautiful dessert with a buttery graham cracker crust, a rich and creamy cheesecake filling, and a glossy cherry topping. It looks impressive on the table, but the steps are simple when you prepare it slowly and give it enough time to chill.
The smooth cream cheese layer has a gentle vanilla flavor and a light tang from sour cream, while the cherries add sweetness and a bright finish. Every slice has a creamy center, a little crunch from the crust, and a fruity topping that makes it perfect for birthdays, holidays, family dinners, or a special weekend dessert.
The most important parts of a successful cheesecake are using room-temperature ingredients, mixing gently, baking at a moderate temperature, and cooling the cheesecake slowly. These simple details help create a smooth filling with a neat, sliceable texture.
Why You Will Love This Recipe
This cheesecake has the classic flavor that everyone loves. The filling is creamy and rich without being overly sweet, and the cherry topping gives it a beautiful bakery-style look.
It can be made one day ahead, making it an excellent dessert for entertaining. In fact, chilling overnight improves both the flavor and the texture.
You can also use this recipe as a base for many other toppings. Try strawberry pie filling, blueberry topping, caramel sauce, lemon curd, chocolate ganache, or fresh berries when you want a different version.
Recipe Information
Prep time: 25 minutes
Bake time: 55 to 65 minutes
Cooling and chilling time: At least 6 hours
Total time: About 7 hours
Servings: 10 to 12 slices
Difficulty: Medium
Best for: Holidays, celebrations, family desserts, and make-ahead treats
Ingredients
For the Graham Cracker Crust
2 cups graham cracker crumbs
1/4 cup granulated sugar
1/2 teaspoon ground cinnamon, optional
1/2 cup unsalted butter, melted
For the Cheesecake Filling
4 packages cream cheese, 8 ounces each, softened
1 1/4 cups granulated sugar
1/4 cup sour cream, room temperature
1/4 cup heavy cream, room temperature
1 tablespoon vanilla extract
4 large eggs, room temperature
2 tablespoons all-purpose flour
1/4 teaspoon salt
1 teaspoon lemon zest, optional
For the Cherry Topping
- 2 cans cherry pie filling, about 21 ounces each
- 1 tablespoon lemon juice, optional
- 1/2 teaspoon almond extract, optional
Choosing the Best Ingredients
Full-fat block cream cheese gives the best texture for cheesecake. Avoid cream cheese spread from a tub because it contains extra moisture and can make the filling too soft.
Take the cream cheese, eggs, sour cream, and heavy cream out of the refrigerator before you begin. Room-temperature ingredients combine more smoothly and reduce the chance of small lumps in the filling.
Graham crackers make a classic crust, but vanilla wafers, digestive biscuits, or chocolate cookie crumbs can also work. If using sweet cookie crumbs, reduce the sugar slightly.
Cherry pie filling is the quickest topping, but choose a good-quality brand with whole cherries whenever possible. Adding a small amount of lemon juice brightens the flavor, while almond extract gives the cherries a classic bakery-style taste.
Equipment You Will Need
A 9-inch springform pan is ideal because the removable sides make it easy to release the cheesecake without damaging it. Wrap the outside of the pan in foil if you plan to use a water bath.
You will also need a large mixing bowl, an electric mixer, a rubber spatula, measuring cups, and a cooling rack. A small offset spatula can help smooth the top before baking, but it is not required.
How to Make Classic Cherry Cheesecake
Preheat your oven to 325°F. Grease the bottom and sides of a 9-inch springform pan with butter or nonstick cooking spray.
To make the crust, combine the graham cracker crumbs, sugar, cinnamon if using, and melted butter in a medium bowl. Stir until all the crumbs are evenly moistened. The mixture should hold together when pressed between your fingers.
Pour the crumbs into the prepared springform pan. Use the bottom of a measuring cup or glass to press the crumbs firmly over the bottom of the pan and slightly up the sides. A firm crust is important because it gives each slice a clean base.
Bake the crust for 8 to 10 minutes. Remove it from the oven and place the pan on a rack while you prepare the filling. Keep the oven at 325°F.
Add the softened cream cheese to a large bowl. Beat it on medium-low speed until completely smooth. Scrape down the sides and bottom of the bowl several times with a rubber spatula. This step is important because cream cheese can hide in the bottom of the bowl.
Add the sugar and beat until smooth and creamy. Mix in the sour cream, heavy cream, vanilla extract, flour, salt, and lemon zest if using. Keep the mixer on low or medium-low speed. Overmixing adds extra air, which can cause the cheesecake to puff and crack while baking.
Add the eggs one at a time, mixing on low speed just until each egg disappears into the batter. Scrape the bowl between additions if needed. The filling should look smooth, creamy, and thick.
Pour the cheesecake filling over the warm crust. Smooth the top gently with a spatula. Tap the pan lightly on the counter a few times to remove air bubbles.
For a water bath, place the foil-wrapped springform pan inside a larger roasting pan. Pour hot water into the roasting pan until it reaches about halfway up the sides of the springform pan. The water bath helps the cheesecake bake gently and can reduce cracking.
Bake the cheesecake for 55 to 65 minutes. The outer edges should look set, while the middle should still have a small gentle wobble when the pan is moved. Do not wait for the center to look completely firm, because it continues to set as the cheesecake cools.
Turn off the oven and crack the door open slightly. Let the cheesecake sit in the warm oven for 30 minutes. This slow cooling step helps prevent sudden temperature changes that can cause cracks.
Remove the cheesecake from the oven and cool it on a wire rack for about one hour. Run a thin knife around the inside edge of the pan to loosen the cheesecake from the sides. Do not remove the springform ring yet.
Cover the cooled cheesecake loosely and refrigerate it for at least 6 hours. Overnight chilling is best for a firm texture and clean slices.
Before serving, remove the ring from the springform pan. Stir the cherry pie filling with lemon juice and almond extract if using. Spoon the topping gently over the top of the cold cheesecake, leaving a small border around the edge if you like the creamy layer to show.
Slice the cheesecake with a long sharp knife. Wipe the knife clean with warm water between slices for the neatest presentation.
Tips for a Smooth Cheesecake Filling
Always begin with softened cream cheese. Cold cream cheese does not blend easily, and small lumps can remain even after several minutes of mixing.
Mix the batter at a low speed after adding eggs. High-speed mixing adds too much air, which can cause the cheesecake to rise quickly and then sink or crack as it cools.
Scrape down the bowl often. This simple habit makes a big difference because it ensures every part of the cream cheese is blended into the filling.
Do not overbake the cheesecake. The center should still jiggle slightly when it comes out of the oven. A completely firm center usually means the cheesecake has baked too long.
How to Prevent Cheesecake Cracks
A water bath is helpful, but it is not the only way to prevent cracks. The biggest secret is avoiding quick changes in temperature.
Let the cheesecake cool slowly in the turned-off oven before moving it to the counter. Then cool it at room temperature before placing it in the refrigerator.
Avoid opening the oven door repeatedly during baking. Sudden cold air can cause the cheesecake to fall or crack.
If your cheesecake does crack, do not worry. The cherry topping covers the surface beautifully, and the cheesecake will still taste delicious.
Easy Variations
For a chocolate cherry cheesecake, use chocolate cookie crumbs for the crust and add 1/2 cup melted semi-sweet chocolate to the cheesecake filling after mixing in the sour cream.
For a mini cherry cheesecake version, line a muffin pan with paper liners. Press a small amount of crust into each liner, add filling, and bake until the centers are set. Top each mini cheesecake with a spoonful of cherry filling after chilling.
For a no-bake style dessert, use a no-bake cream cheese filling and chill it in the prepared crust. The texture will be lighter and softer than baked cheesecake, but it is a great option for warm weather.
For a lemon cherry cheesecake, add 2 tablespoons lemon juice and 1 tablespoon lemon zest to the filling. The extra citrus flavor pairs beautifully with sweet cherries.
What to Serve with Cherry Cheesecake
Cherry cheesecake is rich enough to serve on its own, but a little whipped cream makes every slice feel extra special. Add a few fresh cherries, chocolate curls, or a small mint leaf for a simple finishing touch.
Coffee, espresso, black tea, or a glass of cold milk are all great drinks to serve alongside this dessert. The slight bitterness of coffee balances the sweet topping and creamy filling.
For a holiday dessert table, serve cheesecake with cookies, brownies, fruit salad, and a tray of small desserts so guests can enjoy a variety of treats.
Make-Ahead Instructions
Cheesecake is one of the best desserts to prepare ahead because it needs time to chill. Bake the cheesecake one day before serving and refrigerate it overnight.
For the prettiest result, add the cherry topping on the day you plan to serve it. You can also add it the night before if the cheesecake will be stored covered in the refrigerator.
Keep the cheesecake in the springform pan until fully chilled. This protects the edges and makes it easier to move.
Storing Leftovers
Store leftover cheesecake in an airtight container in the refrigerator for up to five days. Keep it covered so it does not absorb odors from other foods.
For individual slices, place small pieces of parchment paper between slices if you need to stack them in a container. This prevents the cherry topping from sticking to the crust or cream cheese layer.
Can You Freeze Cherry Cheesecake?
Yes, cheesecake freezes very well. For the best texture, freeze the cheesecake without the cherry topping.
Allow the cheesecake to chill completely, then wrap it tightly in plastic wrap followed by a layer of foil. Freeze for up to two months.
Thaw it overnight in the refrigerator. Add the cherry topping after thawing, shortly before serving. Individual slices can also be frozen for convenient desserts later.
Common Mistakes to Avoid
One common mistake is using cold cream cheese. This creates a lumpy filling that is difficult to fix once eggs are added.
Another mistake is overmixing after the eggs go in. Too much air can make the cheesecake rise too high and crack as it cools.
Do not rush the chilling time. Cheesecake needs several hours in the refrigerator to fully set. A warm or only partly chilled cheesecake will not slice neatly.
Avoid removing the springform ring too early. The chilled filling needs the support of the pan until it is firm.
Frequently Asked Questions
Can I use frozen cherries instead of pie filling?
Yes. Cook frozen cherries with sugar, cornstarch, and a little lemon juice until thickened, then cool completely before spooning over the cheesecake.
Can I make this without a water bath?
Yes. Bake the cheesecake directly on the oven rack, then cool it slowly in the turned-off oven. The top may crack slightly, but the cherry topping will cover it.
Why is my cheesecake still soft in the middle?
It may need more chilling time. Refrigerate it overnight before slicing. If it was very loose after baking, it may also have been underbaked.
How do I get clean slices?
Use a long knife dipped in hot water, then wipe it dry before every cut. Repeat between slices for the cleanest results.
Can I use low-fat