The Ultimate Lemon Cream Layer Cake Guide
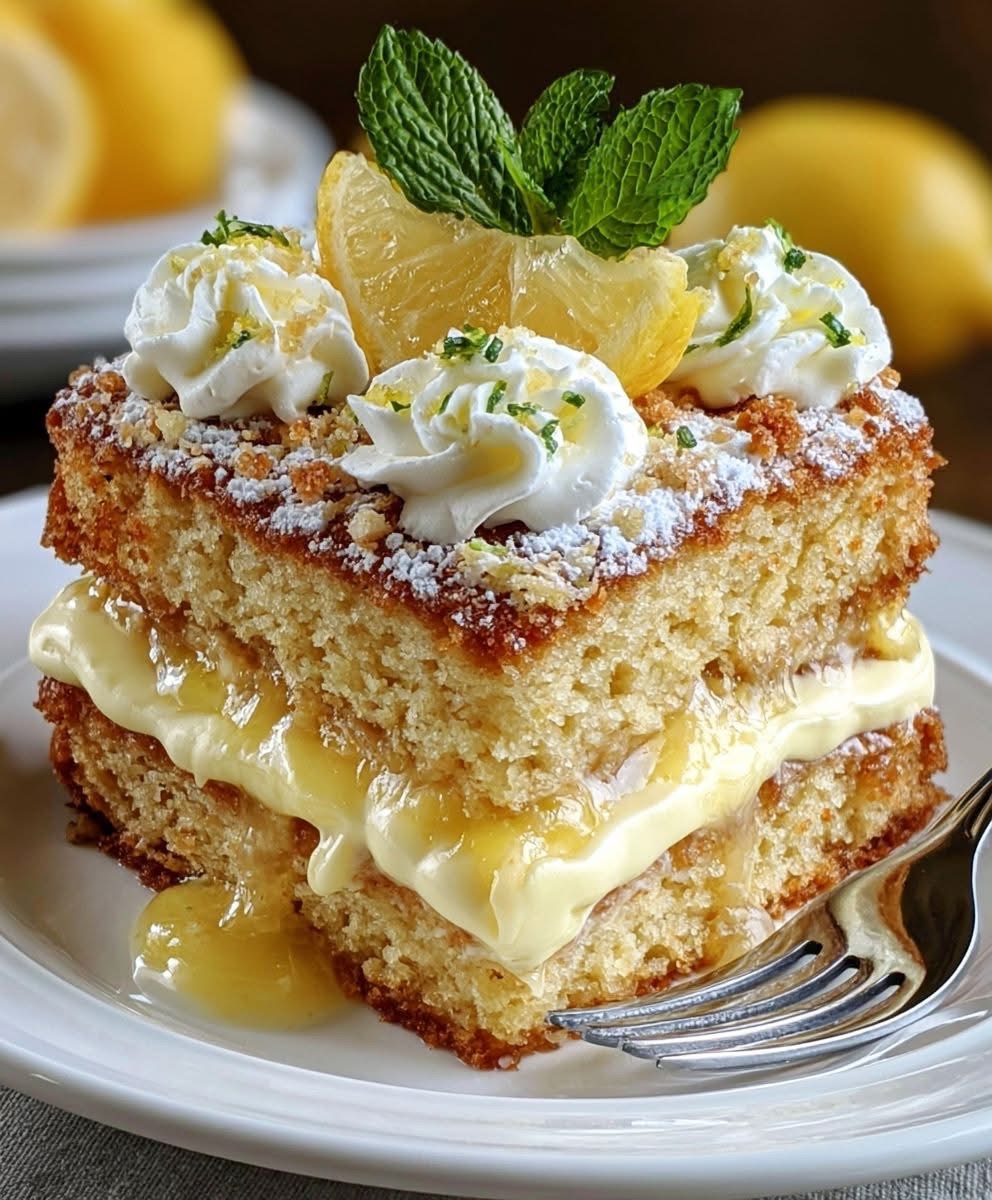
The Lemon Cream Layer Cake is a masterful dessert featuring soft sponge layers, tart citrus curd, and velvety whipped frosting. This extensive, encyclopedia-style guide covers the history, chemistry, health context, culture, and precise instructions required to build this spectacular cake from scratch.
1. Introduction: The Art of the Citrus Cake
A perfect layer cake balances taste, texture, structural integrity, and presentation. Lemon desserts hold a unique position in baking because citric acid cuts through heavy fats and sugars, refreshing the palate.
In this recipe, we pair an oil-and-butter sponge with a cooked lemon curd and an airy white chocolate mascarpone cream. This multi-tiered creation acts as a stunning centerpiece for spring celebrations, summer garden parties, and elegant dinner events.
2. Historical Evolution of Lemon Cakes
Early Ancestors: Medieval Citrus and Sugar
Citrus fruits traveled from Asia to the Mediterranean via early trade routes. By the Renaissance, European nobility prized lemons for their aromatic rinds and sharp juices. Early recipes combined citrus with heavy yeast doughs or dense almond pastes.
The Rise of the Sponge Cake
The modern layer cake relies on the invention of the sponge cake in the 18th and 19th centuries. Bakers discovered that whipping whole eggs or egg whites captured microscopic air bubbles, allowing cakes to rise without chemical leavening agents.
The Cult of Curd and Cream
Lemon curd, originally known as “lemon cheese,” emerged in 19th-century England. Early variations were made by acidifying cream with lemon juice and straining the curds through cheesecloth. Over time, the recipe evolved into a smooth custard made from egg yolks, sugar, juice, and butter.
When industrial refrigeration arrived in the 20th century, bakers began combining delicate sponges with chilled fruit curds and stable dairy creams. This led directly to the contemporary Lemon Cream Layer Cake we enjoy today.
3. Ingredients: Complete Component Breakdown
To guarantee success, gather high-quality ingredients and bring all cold items to room temperature before you begin baking.
For the Velvet Lemon Sponge
- Cake Flour: 420g (3 ½ cups) – Low protein ensures a tender, delicate crumb.
- Baking Powder: 15g (3 tsp) – Provides consistent, even chemical leavening.
- Baking Soda: 2.5g (½ tsp) – Reacts with buttermilk to maximize tenderness.
- Fine Sea Salt: 5g (1 tsp) – Sharpens the citrus profile and balances sweetness.
- Unsalted Butter: 226g (1 cup / 2 sticks) – Softened to 18°C (65°F) for clean creaming.
- Vegetable Oil: 60ml (¼ cup) – Keeps the sponge remarkably moist when cold.
- Granulated Sugar: 400g (2 cups) – Adds sweetness and locks in moisture.
- Fresh Lemon Zest: 25g (approx. 4 large lemons) – Releases vital aromatic oils.
- Large Eggs: 5 pieces (250g without shells) – Supplies structure and emulsification.
- Pure Vanilla Extract: 10ml (2 tsp) – Deepens the overall flavor profile.
- Fresh Lemon Juice: 45ml (3 tbsp) – Adds natural acidity to the cake batter.
- Whole Buttermilk: 240ml (1 cup) – Breaks down gluten strands for a softer bite.
For the Intensely Tart Lemon Curd Filling
- Egg Yolks: 6 pieces – Creates a thick, rich, glossy emulsion.
- Granulated Sugar: 150g (¾ cup) – Balances the intense, sharp citrus juice.
- Fresh Lemon Juice: 120ml (½ cup) – Provides a bright, punchy flavor profile.
- Fresh Lemon Zest: 10g (approx. 2 lemons) – Maximizes the bright citrus aroma.
- Fine Sea Salt: 1g (a pinch) – Tempers the sweetness of the sugar.
- Unsalted Butter: 115g (½ cup / 1 stick) – Cold, cubed to stop the cooking process.
For the White Chocolate Mascarpone Cream Frosting
- White Chocolate: 150g (5.3 oz) – High-quality baking bars, melted and cooled.
- Mascarpone Cheese: 250g (8.8 oz) – Chilled; provides body and subtle tang.
- Heavy Whipping Cream: 480ml (2 cups) – Minimum 36% milk fat, kept ice-cold.
- Powdered Sugar: 90g (¾ cup) – Sifted to eliminate lumps in the frosting.
- Pure Vanilla Bean Paste: 5ml (1 tsp) – Adds beautiful visual flecks and depth.
4. Scientific Formation and Chemistry of the Cake
Baking is a science driven by precise chemical reactions. Understanding these principles helps you avoid common pitfalls.
The Mechanics of Sugar Rubbing (Zesting)
Rubbing fresh lemon zest directly into granulated sugar uses abrasion to burst the microscopic oil sacs (flavedo) in the rind. The sugar absorbs these essential oils, distributing an intense, natural lemon flavor evenly throughout the entire batter.
Creaming Kinetics
Beating softened butter and sugar together creates a complex web of air pockets. The jagged sugar crystals cut into the solid fat, trapping air. When baked, these pockets expand with steam, resulting in a light, fluffy sponge.
Emulsification Stability
Eggs naturally contain lecithin, a powerful emulsifier that bonds water-based liquids with solid fats. Adding eggs slowly prevents the batter from curdling. A broken emulsion cannot trap air efficiently, which can make your cake dense or greasy.
[Fat + Sugar Creaming] ---> Creates microscopic air pockets
[Slow Egg Addition]    ---> Establishes a stable emulsion
[Heat Application]     ---> Gases expand + Proteins solidify = Perfect crumb structure
5. Step-by-Step Instructions and Baking Methods
Follow these sequential steps carefully to prepare, bake, and assemble your cake layers.
Step 1: Pre-Baking Preparation
- Position your oven rack in the center slot.
- Preheat your oven to 175°C (350°F).
- Trace three 20cm (8-inch) round cake pans onto parchment paper and cut out the circles.
- Grease the pans with softened butter, insert the parchment rounds, and dust lightly with flour.
Step 2: Dry Ingredient Sifting
- Set a large fine-mesh sieve over a mixing bowl.
- Add the cake flour, baking powder, baking soda, and fine sea salt.
- Sift the mixture twice to distribute the leavening agents and aerate the flour.
Step 3: Creaming and Batter Integration
- Combine the granulated sugar and lemon zest in your stand mixer bowl. Rub them together with your fingertips until the sugar is fragrant and damp.
- Add the softened butter and vegetable oil. Attach the paddle tool and beat on medium-high speed for 5 minutes until the mixture looks pale and fluffy.
- Lower the speed to medium. Add the eggs one at a time, letting each incorporate fully before adding the next.
- Pour in the vanilla extract and fresh lemon juice, mixing until combined.
- Alternate adding your dry ingredients and buttermilk in three batches, starting and ending with the flour mixture. Mix on low speed just until the flour streaks disappear to avoid overworking the gluten.
Step 4: Baking and Cooling Protocol
- Divide your cake batter evenly among the three prepared pans (approx. 470g per pan).
- Smooth the tops with an offset spatula and tap the pans gently on the counter to release large air bubbles.
- Bake for 23 to 27 minutes. The tops should spring back when touched gently, and a toothpick inserted into the center should come out clean.
- Cool the pans on a wire rack for 10 minutes. Run a thin knife around the edges, invert the layers onto the racks, remove the parchment, and let them cool completely.
Step 5: Preparing the Lemon Curd Filling
- Fill a medium saucepan with 2 inches of water and bring it to a gentle simmer.
- Whisk the egg yolks, granulated sugar, lemon juice, zest, and salt together in a heatproof glass bowl until smooth.
- Set the bowl over the simmering water, making sure the bottom does not touch the water.
- Stir constantly with a silicone spatula for 8 to 12 minutes. The curd is ready when it thickens to a pudding-like consistency and coats the back of a spoon (82°C / 180°F).
- Remove the bowl from the heat. Whisk in the cold, cubed butter one piece at a time until completely smooth.
- Strain the curd through a fine-mesh sieve into a bowl to remove any accidental egg bits. Press plastic wrap directly onto the surface to prevent a skin from forming, then chill for at least 4 hours.
Step 6: Preparing the White Chocolate Mascarpone Frosting
- Melt your white chocolate in a heatproof bowl over simmering water or in the microwave at 50% power, stirring frequently. Set it aside to cool to room temperature.
- Place the cold mascarpone cheese and powdered sugar in a clean mixer bowl. Beat on medium speed for 1 minute until smooth.
- Slowly pour in the cooled, melted white chocolate while mixing on low speed.
- Pour in the ice-cold heavy whipping cream and vanilla bean paste. Switch to the whisk attachment.
- Whip the mixture on medium-high speed until it holds stiff peaks. Be careful not to over-whip, or the mascarpone may curdle.
Step 7: Final Cake Assembly and Decoration
- Level your cooled cake layers with a long serrated knife if they have domed tops.
- Place your first cake layer onto a serving plate or cardboard round.
- Scoop ½ cup of the whipped frosting into a piping bag fitted with a round tip. Pipe a ½-inch-tall border around the top edge of the cake layer to form a dam.
- Fill the center of the dam with half of your chilled lemon curd, spreading it into an even layer.
- Place the second cake layer on top and repeat the frosting dam and curd filling process.
- Cap the cake with the final sponge layer, placing it bottom-side up for a perfectly flat top surface.
- Frost the top and sides of the cake with a thin layer of cream to seal in loose crumbs (the crumb coat). Chill the cake for 30 minutes to set this layer.
- Apply the remaining frosting over the set crumb coat, smoothing it with a bench scraper or creating decorative swirls with your spatula.
- Decorate with fresh lemon slices, mint leaves, or white chocolate curls if desired. Chill for at least 2 hours before slicing.
6. Nutritional Profile and Micro-Macro Data
The following breakdown estimates the nutritional content per individual slice, assuming the cake is cut into 16 equal portions.
| Nutrient Component | Value Per Serving | Daily Reference Value (% DV) |
|---|---|---|
| Total Calories | 580 kcal | 29% |
| Total Fat | 36g | 46% |
| Saturated Fat | 21g | 105% |
| Trans Fat | 0.5g | — |
| Cholesterol | 165mg | 55% |
| Sodium | 290mg | 13% |
| Total Carbohydrates | 59g | 21% |
| Dietary Fiber | 1g | 4% |
| Sugars (Added) | 42g | 84% |
| Protein | 7g | 14% |
| Vitamin D | 0.8mcg | 4% |
| Calcium | 95mg | 8% |
| Iron | 1.8mg | 10% |
| Potassium | 120mg | 3% |
7. Dietary and Health Benefits of Key Components
While this cake is an indulgent dessert, its core ingredients offer several distinct culinary and biological benefits:
- Fresh Citrus Oils and Ascorbic Acid: Real lemon juice and zest contain Vitamin C and d-limonene. These natural antioxidants support immune function and help neutralize free radicals.
- Egg-Derived Proteins and Fats: High-quality eggs provide bioavailable proteins, essential amino acids, choline for neurological health, and lutein for vision support.
- Satiety and Energy Delivery: The healthy fats in mascarpone cheese and heavy cream slow down sugar absorption, providing a more sustained release of energy compared to fat-free candies.
8. For the Lovers of Baking: Baker’s Tips and Troubleshooting
This section addresses common baking issues to help you achieve a flawless result.
The Troubleshooting Matrix
| Symptoms | Root Cause | Preventive Correction |
|---|---|---|
| Dense, heavy, or gummy sponge layers | Over-mixing the batter after adding flour, which develops too much gluten. | Mix on low speed just until the dry ingredients disappear. |
| The cake domes or cracks on top | The oven temperature is too high, causing the outside to cook before the center rises. | Verify your oven’s accuracy with an independent thermometer; lower heat if needed. |
| The filling leaks out the sides | The frosting dam was too weak, or the lemon curd was too warm and thin. | Chill your curd completely and use a stiff frosting border during assembly. |
| The frosting splits or curdles | The mascarpone cheese was over-whipped, or the white chocolate was too warm when added. | Let your melted chocolate cool completely, and whip the cream on medium speed. |
9. Conclusion: The Ultimate Reward
Mastering the Lemon Cream Layer Cake takes patience, precision, and attention to detail. By carefully managing each step—from zesting your sugar to piping your frosting dam—you create a dessert that is far more than the sum of its parts.
Every slice offers a beautiful contrast of moist sponge, tart curd, and rich, velvety cream. Share this showstopping dessert with friends and family, and enjoy the wonderful rewards of home baking!
If you would like to customize this recipe, please let me know:
- Do you want to adjust the recipe for a specific dietary restriction (e.g., gluten-free, dairy-free)?
- Would you like guidance on scaling the cake size (e.g., changing to a 6-inch or 10-inch pan)?
- Are you looking for alternative seasonal fruit pairings (e.g., adding fresh raspberries or blueberries)?