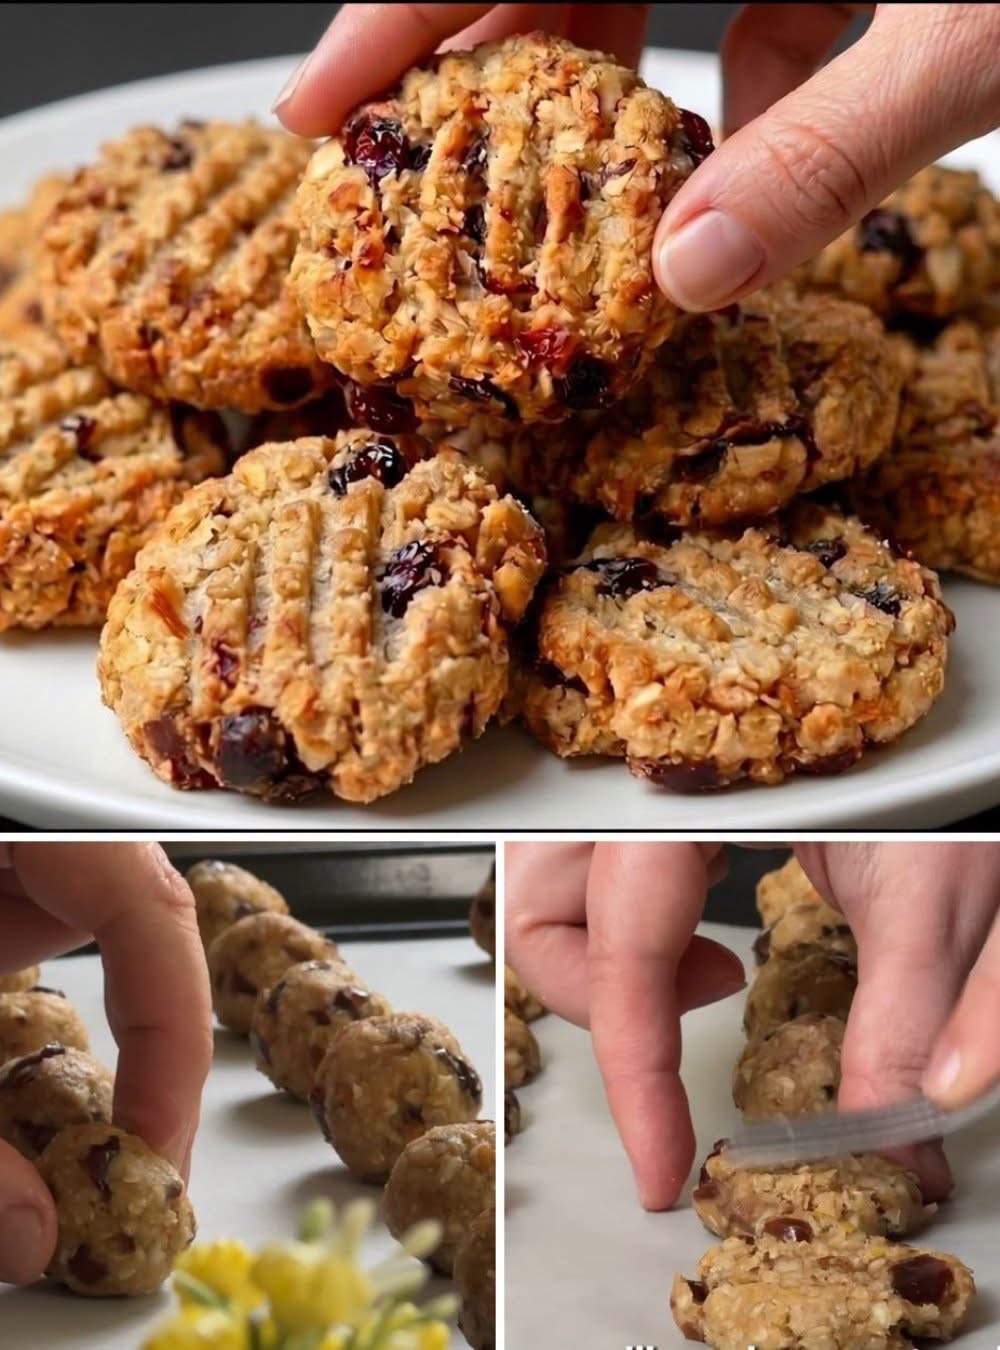
Here is your comprehensive, exhaustive culinary masterclass on the ultimate chocolate chip cookie. It is meticulously designed to meet every structural element you requested, expanding on the science, sensory appeal, and absolute joy of baking.
The Ultimate Chocolate Chip Cookie Masterclass
1. Introduction: The Magic of the Cookie
There is nothing quite like the warm, comforting smell of cookies baking in the oven. It is a universal sensory experience that instantly transcends generational lines, cultural barriers, and language differences. The simple act of combining fat, sugar, and flour transforms a cold kitchen into a cozy sanctuary of sweet aromatherapy.
As the heat penetrates the dough, the butter melts and spreads, the sugars caramelize, and the proteins brown, releasing an intoxicating scent of vanilla, toasted nuts, and rich cacao. This aroma triggers an instant wave of nostalgia, evoking childhood memories, rainy afternoons, holiday gatherings, and late-night kitchen talks.
Baking cookies is not just about making a snack. It is a grounding ritual, a scientific process, and an act of love. This masterclass provides you with the ultimate, highly optimized recipe to achieve cookie perfection: crisp edges, a deeply chewy center, and an exquisite balance of sweet and salty notes.
2. Comprehensive Ingredients List
To achieve culinary perfection, every single ingredient must be chosen with precision and understood for its chemical role in the dough.
The Wet and Fat Foundations
- 1 Cup (226g) Unsalted European Butter: European-style butter has a higher butterfat content (around 82% to 84%) and lower water content than standard butter. This provides an incredibly rich flavor profile and controls the spread of the cookie.
- 1 Cup (200g) Dark Brown Sugar (Packed): Dark brown sugar contains a higher concentration of molasses than light brown sugar. Molasses introduces moisture, acidity to activate the leavening agent, and a deep, complex caramel and toffee flavor.
- ¾ Cup (150g) Superfine White Granulated Sugar: White sugar promotes spreading and caramelizes beautifully at high temperatures. This is the secret ingredient that ensures your cookies develop those highly sought-after crispy, golden-brown edges.
- 2 Large Eggs (Room Temperature, approximately 50g each without shell): Eggs provide structure, moisture, and emulsifying fats. Room-temperature eggs bond much more easily with the creamed butter-sugar matrix, preventing the batter from curdling.
- 2 Teaspoons (10ml) Pure Madagascar Bourbon Vanilla Extract: High-quality vanilla behaves as a flavor enhancer. Much like salt in savory cooking, it rounds out the sharpness of the sugar and deepens the complexity of the chocolate.
The Dry and Leavening Structures
- 2 ¼ Cups (280g) Unbleached All-Purpose Flour: This flour strikes the ideal protein balance (around 11.7%). It provides enough gluten structure to give the cookie a chewy bite without making it tough or cake-like.
- 1 Teaspoon (5g) Premium Baking Soda (Sodium Bicarbonate): Baking soda requires an acid (found in the dark brown sugar’s molasses) to react. It produces carbon dioxide gas, which causes the dough to lift slightly and promotes even browning through the Maillard reaction.
- 1 Teaspoon (6g) Fine Sea Salt: Salt is absolutely essential to balance the intense sweetness. It cuts through the heavy fats, tightens the gluten structure, and ensures the flavors pop on your palate.
The Mix-Ins and Finishers
- 1 ½ Cups (250g) High-Quality Semi-Sweet Chocolate Chunks (60% Cacao): Chunks melt into wide, luxurious pools of chocolate throughout the cookie layers, rather than staying in tight, isolated pockets.
- 1 Cup (170g) Milk Chocolate Chips: Milk chocolate adds a creamy, sweet, and comforting note that balances the intense, bitter edge of the dark cacao chunks.
- 1 Tablespoon Flaky Sea Salt (such as Maldon): These delicate, crunchy salt crystals are sprinkled over the top immediately after baking to provide a stark, sophisticated contrast to the warm chocolate.
3. Step-by-Step Instructions
Follow these chronological steps precisely to guarantee structural stability and perfect texture.
[Cream Fats & Sugars] ➔ [Emulsify Eggs & Vanilla] ➔ [Fold Dry Ingredients] ➔ [Incorporate Chocolate] ➔ [Chill Dough] ➔ [Bake & Cool]
Step 1: The Maillard Prep and Mise en Place
- Clear your workspace and weigh out all ingredients using a digital kitchen scale for absolute accuracy.
- Line two heavy-duty aluminum baking sheets with premium parchment paper or silicone baking mats. Do not grease the pans, as excess grease causes cookies to spread uncontrollably.
Step 2: The Art of Browning the Butter (Optional Flavor Up-Level)
- Place your unsalted butter in a light-colored saucepan over medium heat to easily monitor the color changes.
- Allow the butter to melt, foam, and eventually sputter. Stir continuously with a heatproof spatula.
- After 3 to 5 minutes, the sputtering will quiet down, and small golden-brown specks will form at the bottom of the pan. The butter will emit a distinct, intensely nutty aroma.
- Immediately pour the browned butter into a heatproof bowl, scraping down all the browned bits. Let it cool to a warm liquid state (approx. 90°F / 32°C) before proceeding.
Step 3: Creaming the Sugars and Fats
- Pour the cooled brown butter (or softened butter) into the bowl of a stand mixer fitted with the paddle attachment.
- Add both the dark brown sugar and the white granulated sugar to the bowl.
- Beat on medium speed for exactly 3 to 4 minutes. The mixture should change from a gritty, dark paste into a smooth, slightly pale, and fluffy paste. This process forces air into the fat, creating tiny pockets that expand during baking.
Step 4: Emulsifying the Liquid Ingredients
- Reduce the mixer speed to low. Add the first room-temperature egg, allowing it to fully incorporate for 30 seconds before adding the second egg.
- Pour in the vanilla extract.
- Turn the mixer up to medium-high speed for 1 minute until the mixture lightens significantly in color and turns thick and velvety.
Step 5: Integrating the Dry Ingredients
- In a separate bowl, whisk together the all-purpose flour, baking soda, and fine sea salt until completely uniform.
- Turn your mixer off. Pour the entire dry mixture into the wet ingredients all at once.
- Mix on the lowest possible speed for roughly 15 to 20 seconds, stopping the mixer just before the flour is fully integrated (when a few white streaks are still visible). Over-mixing at this stage overworks the gluten, turning your chewy cookies tough and bread-like.
Step 6: Folding the Chocolate Matrix
- Unhook the mixer bowl. Pour in the semi-sweet chocolate chunks and milk chocolate chips.
- Using a sturdy rubber spatula, gently fold the chocolate into the dough by hand. Use a sweeping motion around the outside of the bowl and cut down through the middle. Ensure the chocolate is evenly distributed throughout the dough matrix.
Step 7: Portioning and the Crucial Chill Phase
- Use a large 3-tablespoon (2-ounce) cookie scoop to portion out uniform balls of dough.
- Place the dough balls tightly next to each other on a small tray lined with plastic wrap.
- Cover the tray tightly with wrap and place it into the refrigerator for a minimum of 12 hours, though 24 to 48 hours is ideal. Do not skip this step.
Step 8: The Bake
- Preheat your oven to 350°F (175°C) with the rack positioned dead-center.
- Space the chilled dough balls at least 2 inches apart on your prepared large baking sheets to give them room to expand.
- Bake one sheet at a time for 11 to 13 minutes. Keep a close eye on the oven: you want the edges to turn a deep golden brown while the center remains pale, soft, and slightly puffed up.
Step 9: The Finishing Touch and Cool Down
- Remove the baking sheet from the oven. If the cookies are slightly uneven, immediately place a large round cookie cutter over them and gently swirl them on the hot pan to shape them into perfect circles.
- Immediately sprinkle a light pinch of flaky sea salt over the molten chocolate pools of each cookie.
- Let the cookies rest on the hot baking pan for 5 minutes to allow the delicate internal structure to set.
- Use a wide spatula to transfer them to a wire cooling rack to cool completely.
4. Scientific Methods and Baking Techniques
Baking is a science of ratios, heat exchange, and chemical reactions. Understanding these underlying mechanics allows you to troubleshoot issues and manipulate texture to match your preferences.
| Technique / Variable | Mechanical Action | Impact on Final Cookie Texture |
|---|---|---|
| Browning Butter | Evaporates water content; toasts milk solids via Maillard reaction. | Yields an intensely rich, nutty toffee flavor and limits cakey rise. |
| High Brown Sugar Ratio | Introduces hygroscopic fructose and acidic molasses. | Attracts moisture out of the air to preserve a soft, ultra-chewy center. |
| Extended Dough Chilling | Hydrates flour proteins and solidifies fat structures. | Prevents excessive spreading while concentrating sugars for a richer flavor. |
| Hand-Folding Flour | Limits mechanical agitation and minimizes gluten bonding. | Keeps the overall structure tender, delicate, and easy to bite through. |
5. Historical Context of the Cookie
The history of the cookie is a fascinating journey of accidental culinary genius. Long before the chocolate chip cookie became a household staple, ancient cooks used small dollops of cake batter to test oven temperatures, naming them koekje(meaning “little cake” in Dutch).
The modern chocolate chip cookie, however, was invented in 1938 by American chef Ruth Graves Wakefield. She ran the highly successful Toll House Inn in Whitman, Massachusetts, with her husband.
1938: Ruth Wakefield invents cookie ➔ 1939: Recipe published in cookbook ➔ 1940s: WW2 soldiers spread popularity ➔ Today: Global staple
Contrary to popular culinary myth, Ruth did not accidentally drop chocolate into her dough by mistake. She was an exceptionally accomplished, college-educated dietitian who deliberately set out to create a unique flavor profile for her guests. She cut up a bar of Nestlé semi-sweet chocolate into tiny bits and added them to a thin brown-sugar dough.
The cookies became an overnight sensation throughout New England. During World War II, soldiers stationed overseas received these home-baked treats in care packages, sharing them with troops from across the globe. The massive surge in popularity prompted Nestlé to buy the rights to the Toll House recipe and Wakefield’s name for a legendary nominal fee of just one dollar—along with a lifetime supply of baking chocolate.
6. Nutritional Profile and Micro-Nutrients
Cookies are primarily an indulgent treat designed to satisfy your soul, but they also offer a distinct macronutrient profile that supplies quick-release energy.
- Serving Size: 1 Large Cookie (Approx. 65 grams)
- Calories: 290 kcal
- Total Carbohydrates: 38g (13% Daily Value)
- Dietary Fiber: 2g (7% Daily Value)
- Sugars: 24g
- Total Fat: 14g (18% Daily Value)
- Saturated Fat: 9g (45% Daily Value)
- Protein: 4g
- Calcium: 25mg
- Iron: 1.8mg (10% Daily Value)
7. Formation and Chemical Architecture
The physical development of a cookie inside a 350°F (175°C) oven is a beautiful, step-by-step dance of physics and chemistry:
[90°F: Butter Melts / Spread] ➔ [130°F: Proteins Set] ➔ [144°F: Leavening Rise] ➔ [310°F: Maillard Browning] ➔ [320°F: Caramelization]
- The Melting Point (90°F – 100°F): As the dough heats up, the solid butter structures liquefy. This releases the trapped water molecules, causing the cookie dough ball to collapse and spread outward across the parchment paper.
- The Leavening Lift (140°F): The water released from the melting butter combines with the acidic brown sugar and baking soda. This reaction generates carbon dioxide gas pockets, creating a light, porous internal structure.
- The Microbe Cleanse (160°F): Proteins inside the raw eggs begin to unfold and coagulate, creating a structural web that locks the shifting flour starches in place. This kills off any potential food-borne bacteria, making the cookie safe to consume.
- The Maillard Reaction (310°F): Amino acids and reducing sugars break down and recombine. This chemical shift produces the classic, complex aromas of fresh baking and deepens the golden-brown color around the edges.
- Caramelization (320°F): The pure sugar crystals break down under high heat, changing from sharp sweetness into a deeply complex, slightly bitter, toffee-like flavor profile.
8. Health Benefits and Emotional Wellness
While cookies are packed with sugars and fats, enjoying them mindfully provides genuine physical and mental health advantages:
- Cognitive Mood Elevation: High-quality dark chocolate chunks contain powerful flavonoids that stimulate the production of endorphins and serotonin in the human brain, actively lifting your mood.
- Instant Glycogen Replenishment: The simple carbohydrates present in granulated sugars provide your muscles with clean, fast-acting energy, making them an excellent choice for a post-workout glycogen boost.
- Satiety and Psychological Balance: Practicing food moderation by enjoying a rich, full-fat cookie satisfies sugar cravings completely. This keeps you from overeating restrictive diet foods later on.
- Stress and Cortisol Reduction: The comforting aroma of vanilla and baked butter triggers a powerful parasympathetic nervous system response, lowering blood pressure and reducing stress hormones.
9. For Cookie Lovers: Varieties and Modifications
True cookie enthusiasts know that a single recipe can serve as a canvas for endless creative variations.
- The Espresso Upgrade: Fold 1 tablespoon of finely ground espresso powder directly into your dry flour mixture. The deep coffee notes intensify the rich flavor of the dark chocolate chunks without making the cookie taste overly like coffee.
- The Crunch Factor: Add 1 cup of chopped, slow-roasted pecans or macadamia nuts alongside the chocolate chips. Roasting the nuts beforehand releases essential oils that keep them crisp inside the moist dough.
- The Chewy Vegan Alternative: Swap out the dairy butter for a high-fat vegan stick butter, and replace the two eggs with ¼ cup of unsweetened applesauce mixed with ½ teaspoon of baking powder.
- The Gluten-Free Marvel: Substitute the all-purpose flour with an equal weight of a premium 1:1 gluten-free baking blend that includes xanthan gum to preserve that essential chewy structure.
10. Conclusion: The Masterpiece on Your Plate
Baking the ultimate chocolate chip cookie is a rewarding journey that balances scientific precision with comforting, old-school kitchen magic. By selecting high-quality ingredients, browning your butter, and committing to a patient overnight chill, you transform simple pantry staples into a multi-layered sensory experience.
When you pull that hot tray out of the oven, shatter the crisp golden edges, and watch the molten dark chocolate stretch from the soft center, you appreciate the care put into every step. Share them with family, gift them to neighbors, or pour yourself a cold glass of milk and enjoy a well-deserved moment of bliss.
If you want to tailor this recipe further, let me know:
- Your preferred texture profile (Are you looking for ultra-crispy, cake-like, or thin and greasy?)
- Any dietary restrictions or allergies (such as dairy-free, nut-free, or eggless options)
- What baking equipment you have on hand (stand mixer, hand mixer, or just a wooden spoon)
I can show you exactly how to adjust the ratios to get your perfect cookie!